Make Your Own Purple Sofa
published on
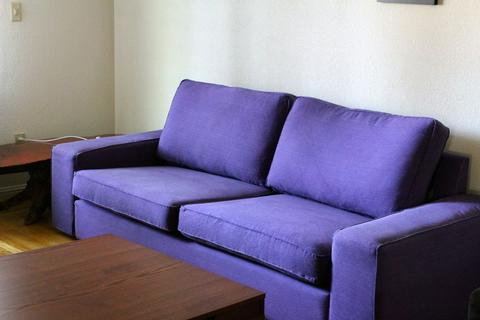
I’ve wanted a purple couch for like ever. I see them now and then (about as often as I see purple cars) and admire them from afar. Since I tend not to spend much money on things that aren’t edible (not including rent and bills), I don’t usually get the chance to own specialty items (unless I make them myself or my friends gift them to me). Luckily (only because I’m a glass half-full type of person–otherwise, I would consider this quite unlucky), when David and I combined houses, I was basically gifted a very pale grayish-beigish Ikea Kivik sofa.
When we first put it in the living room with my pretty black and green furniture, it must have felt like an outsider. My furniture isn’t the type to make fun of others, but there’s no way David’s couch has been feeling at home here. After many attempts at finding reasonably-priced covers for this sofa, I finally started looking at alternatives.
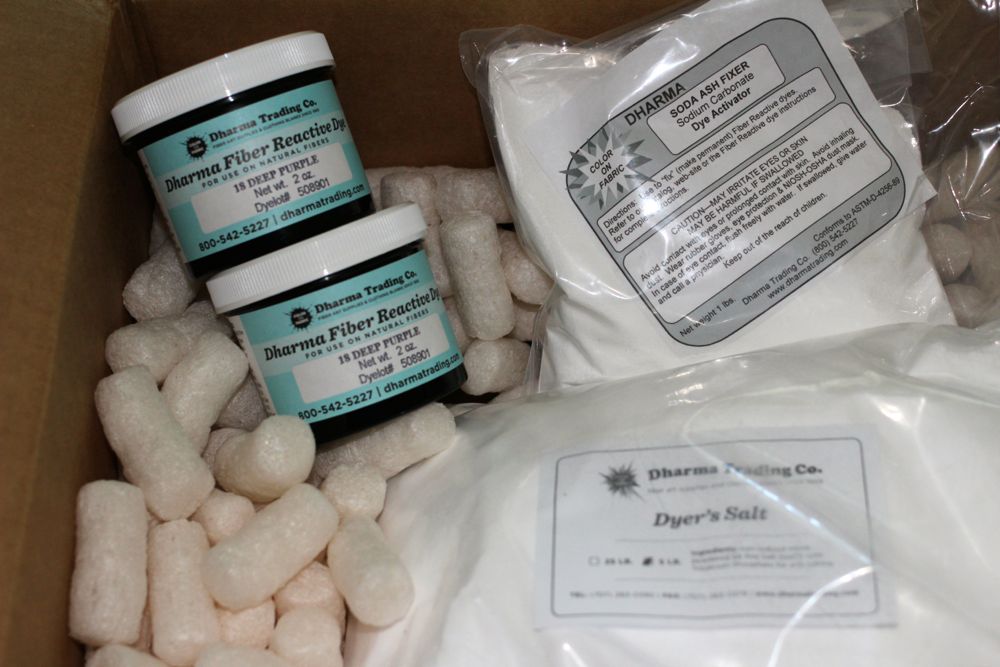
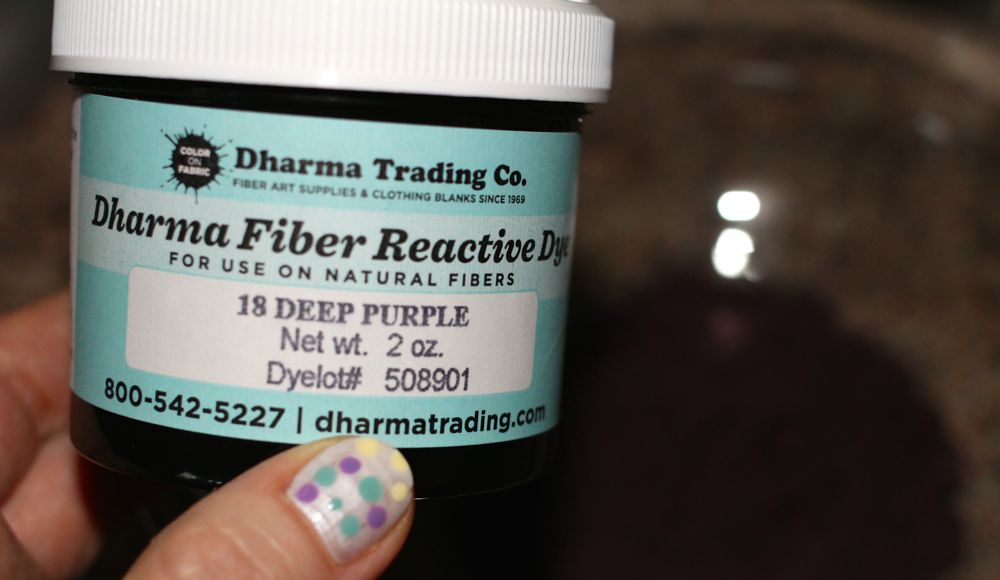
Some people paint their couches, which looks really good when it’s done, but I was slightly concerned about the comfort of the sofa afterwards. That’s when I settled on dying it. I’ve ordered dye from Dharma before, and I like their quality, so I contacted them to find out which dyes were vegan. Every color that is a Fiber Reactive Procion Dye is vegan.
I ordered the following items from Dharma.
- 4 oz deep purple colored dye
- 1 pound soda ash fixer
- 5 pounds salt
Total cost w/ shipping = $25
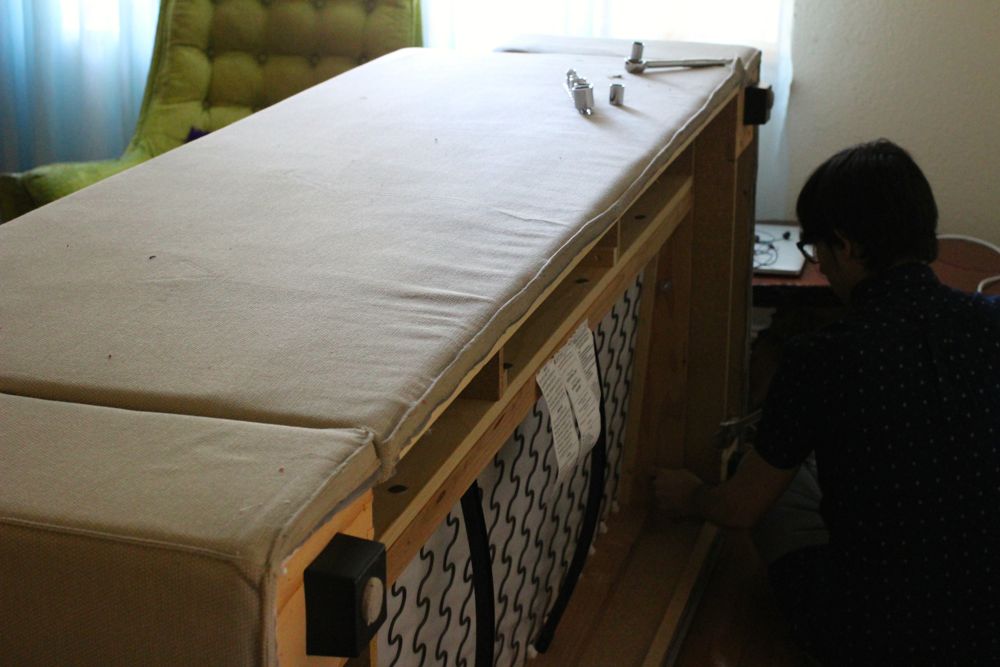
Step 1: Remove the Cover from your Couch
The kivik is easy because it comes in a lot of pieces and they’re all attached to the wooden sofa with velcro. Sorry I didn’t take a good before picture, but here’s David taking the sofa apart.
Step 2: Pre-wash the Cover
They tell you to use their special soap, but I just used my regular eco-friendly soap that I use for all my laundry. They also say to use hot water, but I was scared that my cover would shrink and not fit back onto the couch, so I used warm.
I have a front loading washing machine (around 3-4 cubic feet) which makes it harder than using a top loading machine. But, one advantage to the LG front loading machine is that it has a setting for bulky/large loads, so I used that.
Since the dye needs to be soaking into the fabric for a certain period of time, the tricky part of dying things in a washing machine is that you have to stop the machine before it goes from the wash cycle to the rinse cycle. While I was prewashing, I actually sat in my garage in front of the washer and stared at it until it switched from wash to rinse so I would know the exact moment when it would happen. On mine, that moment is between 31 and 29. (I know that wasn’t a completely exact moment, but Jessica was texting me a crazy story about a text she got from one of her co-workers, so how could I not get distracted?!)
Step 3: Remove the Covers
When the washer is done, remove the damp covers from the washer and set them on the floor or a table until you’re ready to put them back into the washer. At this point, I refered to some instructions that someone contributed to the Dharma website here, and put my own twist on it.
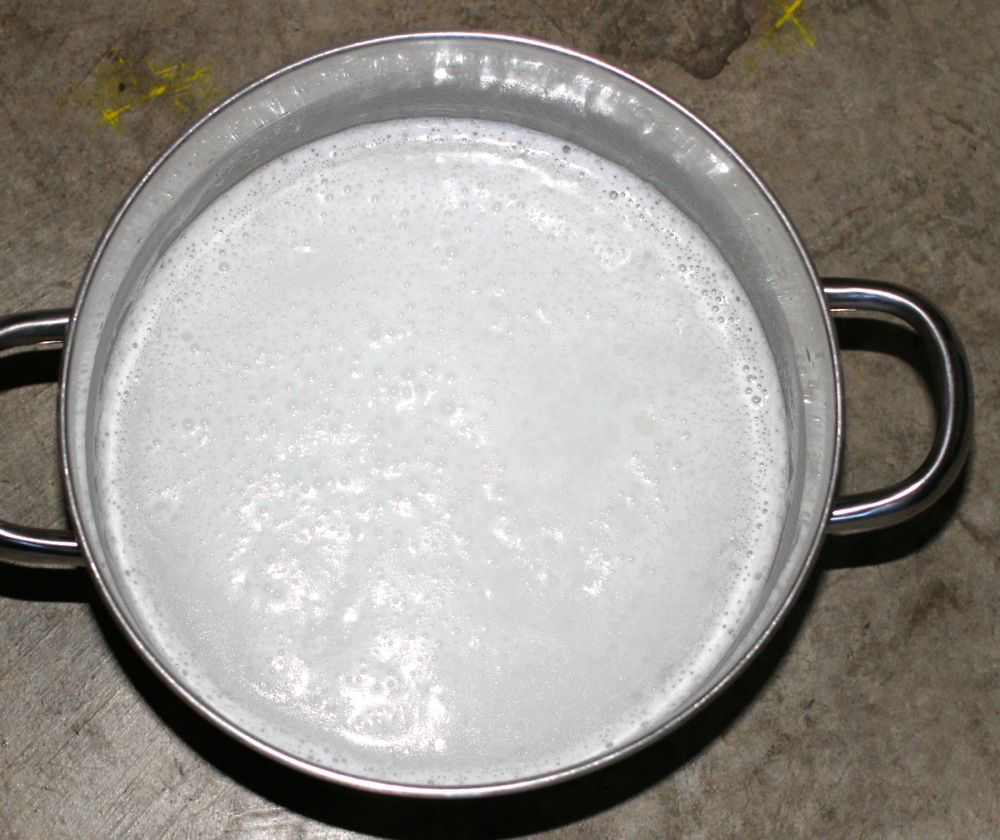
Step 4: Make Salt Water
On the stovetop, boil a half of a pot of water using your largest pot. Then slowly add the salt a cup at a time, dissolving each cup thoroughly (I used a whisk) before adding the next cup. I think I used a total of 8 cups of salt. When it was completely dissolved, the water still looked really white, like paint water.
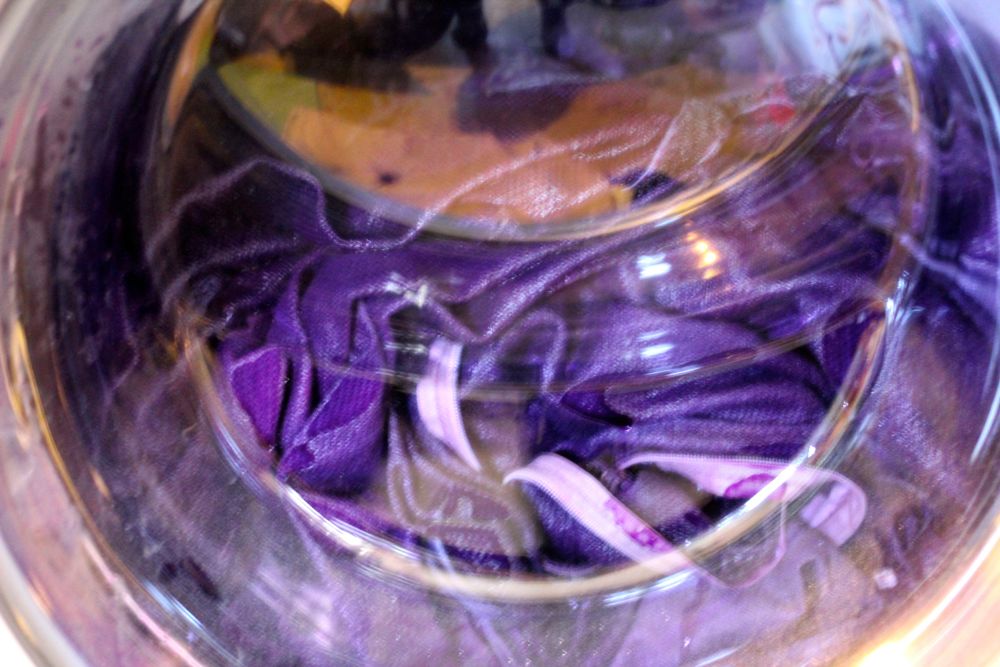
Step 5: Add the Dye
Use a medium sized glass bowl for the dye. Add the dye and then add warm/hot water and stir with a plastic spoon. This is where some people use Urea to help mix the dye so you don’t get tiny dark spots. Urea isn’t vegan, and I am dying my sofa dark purple, so spots won’t show up like they would if I were dying it a pastel color.
Step 6: Add the Salt Water
Start the washer. After 1-2 minutes, pause the load. When the door unlocks, open it, and pour in the salt water. Then close it, and start it again.
Step 7: Add the Dye
Pause the washer after another minute or 2, and open the door once it unlocks. Add the dye mixture. Then start it again. Lay some rags on the floor in front of the washer, because the next time you open it, some dyed water will drip off the door onto the floor.
Step 8: Add the Sofa Covers
After another minute or 2, pause, open, and add the fabric. Then start the load again.
Step 9: Mix the Soda Ash
Five minutes before your washer is about to switch to the rinse cycle (or more if you’re concerned about time), mix your soda ash. I used my largest pot (the same one I used for dissolving the salt) and filled it 2/3 to 3/4 full with hot tap water. I then added a cup of soda ash and whisked it until it was completely dissolved and the water turned clear. This took 2-3 minutes.
Step 10: Add the Soda Ash Water
Pause the washer, turn it off, turn it on, turn the dial to the wash setting you used before (mine was Bulky/Large), and start it. Then every 30-60 seconds, add about 3/4 cup of the soda ash water to the soap compartment. Whenever the soap compartment is empty again, fill it. Repeat this until you’ve used up all the soda ash water. It took me the entire length of a wash cycle (about 22 minutes) plus part of a second cycle until it was gone.
Step 11: Never Let the Washer get to the Rinse Cycle
Remember: no matter what, before the cycle switches to rinse, pause the washer, turn it off, turn it on, turn the dial to the wash setting you used before (mine was Bulky/Large), and start it. You never want to let it get to the rinse cycle or it will drain all your dye and ruin your life (or maybe just the day).
Step 12: Repeat the Wash Cycle Two More Times
You’ll want to repeat the washing cycle at least twice after the soda ash water is completely incorporated. For darker colors, you can even do it a third time. I’m impatient, so I only restarted twice.
Step 13: Now you can Let the Washer Complete a Cycle
Once your fabric has been agitating in the dye and soda ash for a minimum of 30 minutes and a maximum of an hour, let the wash cycle run its complete course. Make sure that when it’s on the rinse cycle, that the water temperature is turned to cold.
Step 14: Start a New Load with Detergent
When that load is complete, you want to wash it once last time as you would wash any load of laundry with detergent and fabric softener. They say to use hot water, but again, I was scared of shrinking my cover, so I used cold.
Step 15: Dry the Couch Covers
Ideally, to make sure you don’t shrink your fabric, hanging things out to dry is the best. However, I’m a bit short on places to hang large laundry items, such as sofa covers, so I put mine in the dryer on ultra low. We did have some difficulty getting the covers on, so I would suggest using all cold water and not using the dryer to dry them.
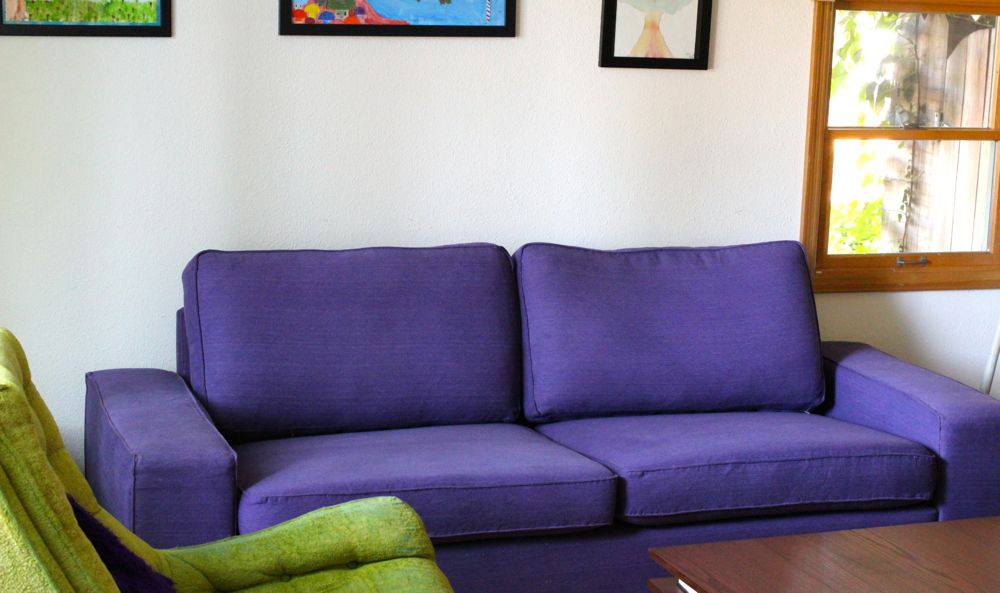
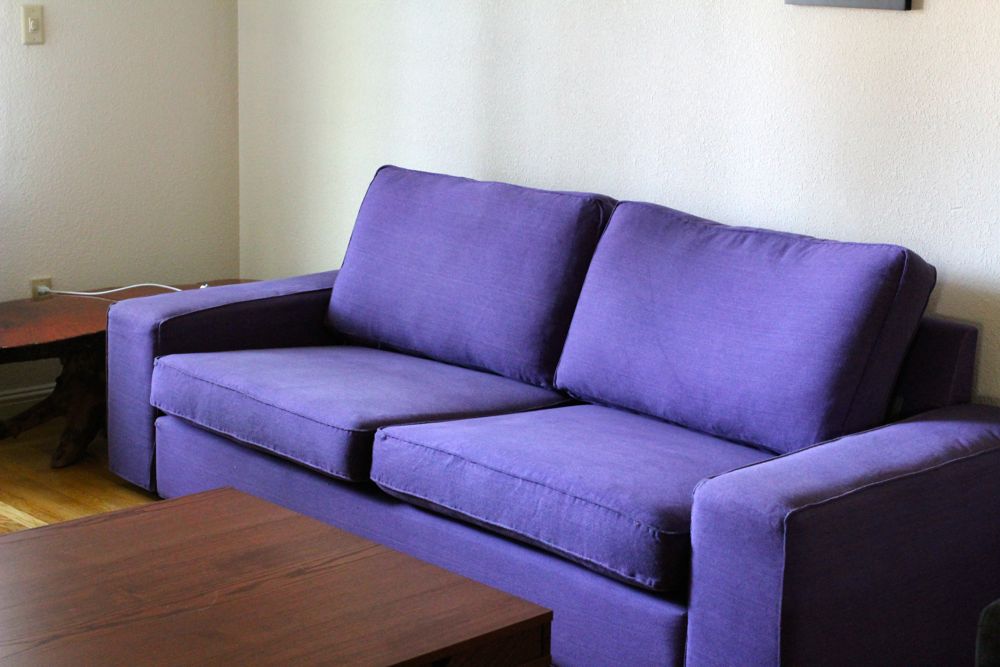
Luckily with some cohersion, they finally agreed to do what we wanted. It has been 10 years since I dyed this sofa, and it still looks great.
☆☆☆☆☆☆☆☆☆☆