Bear Hat
published on
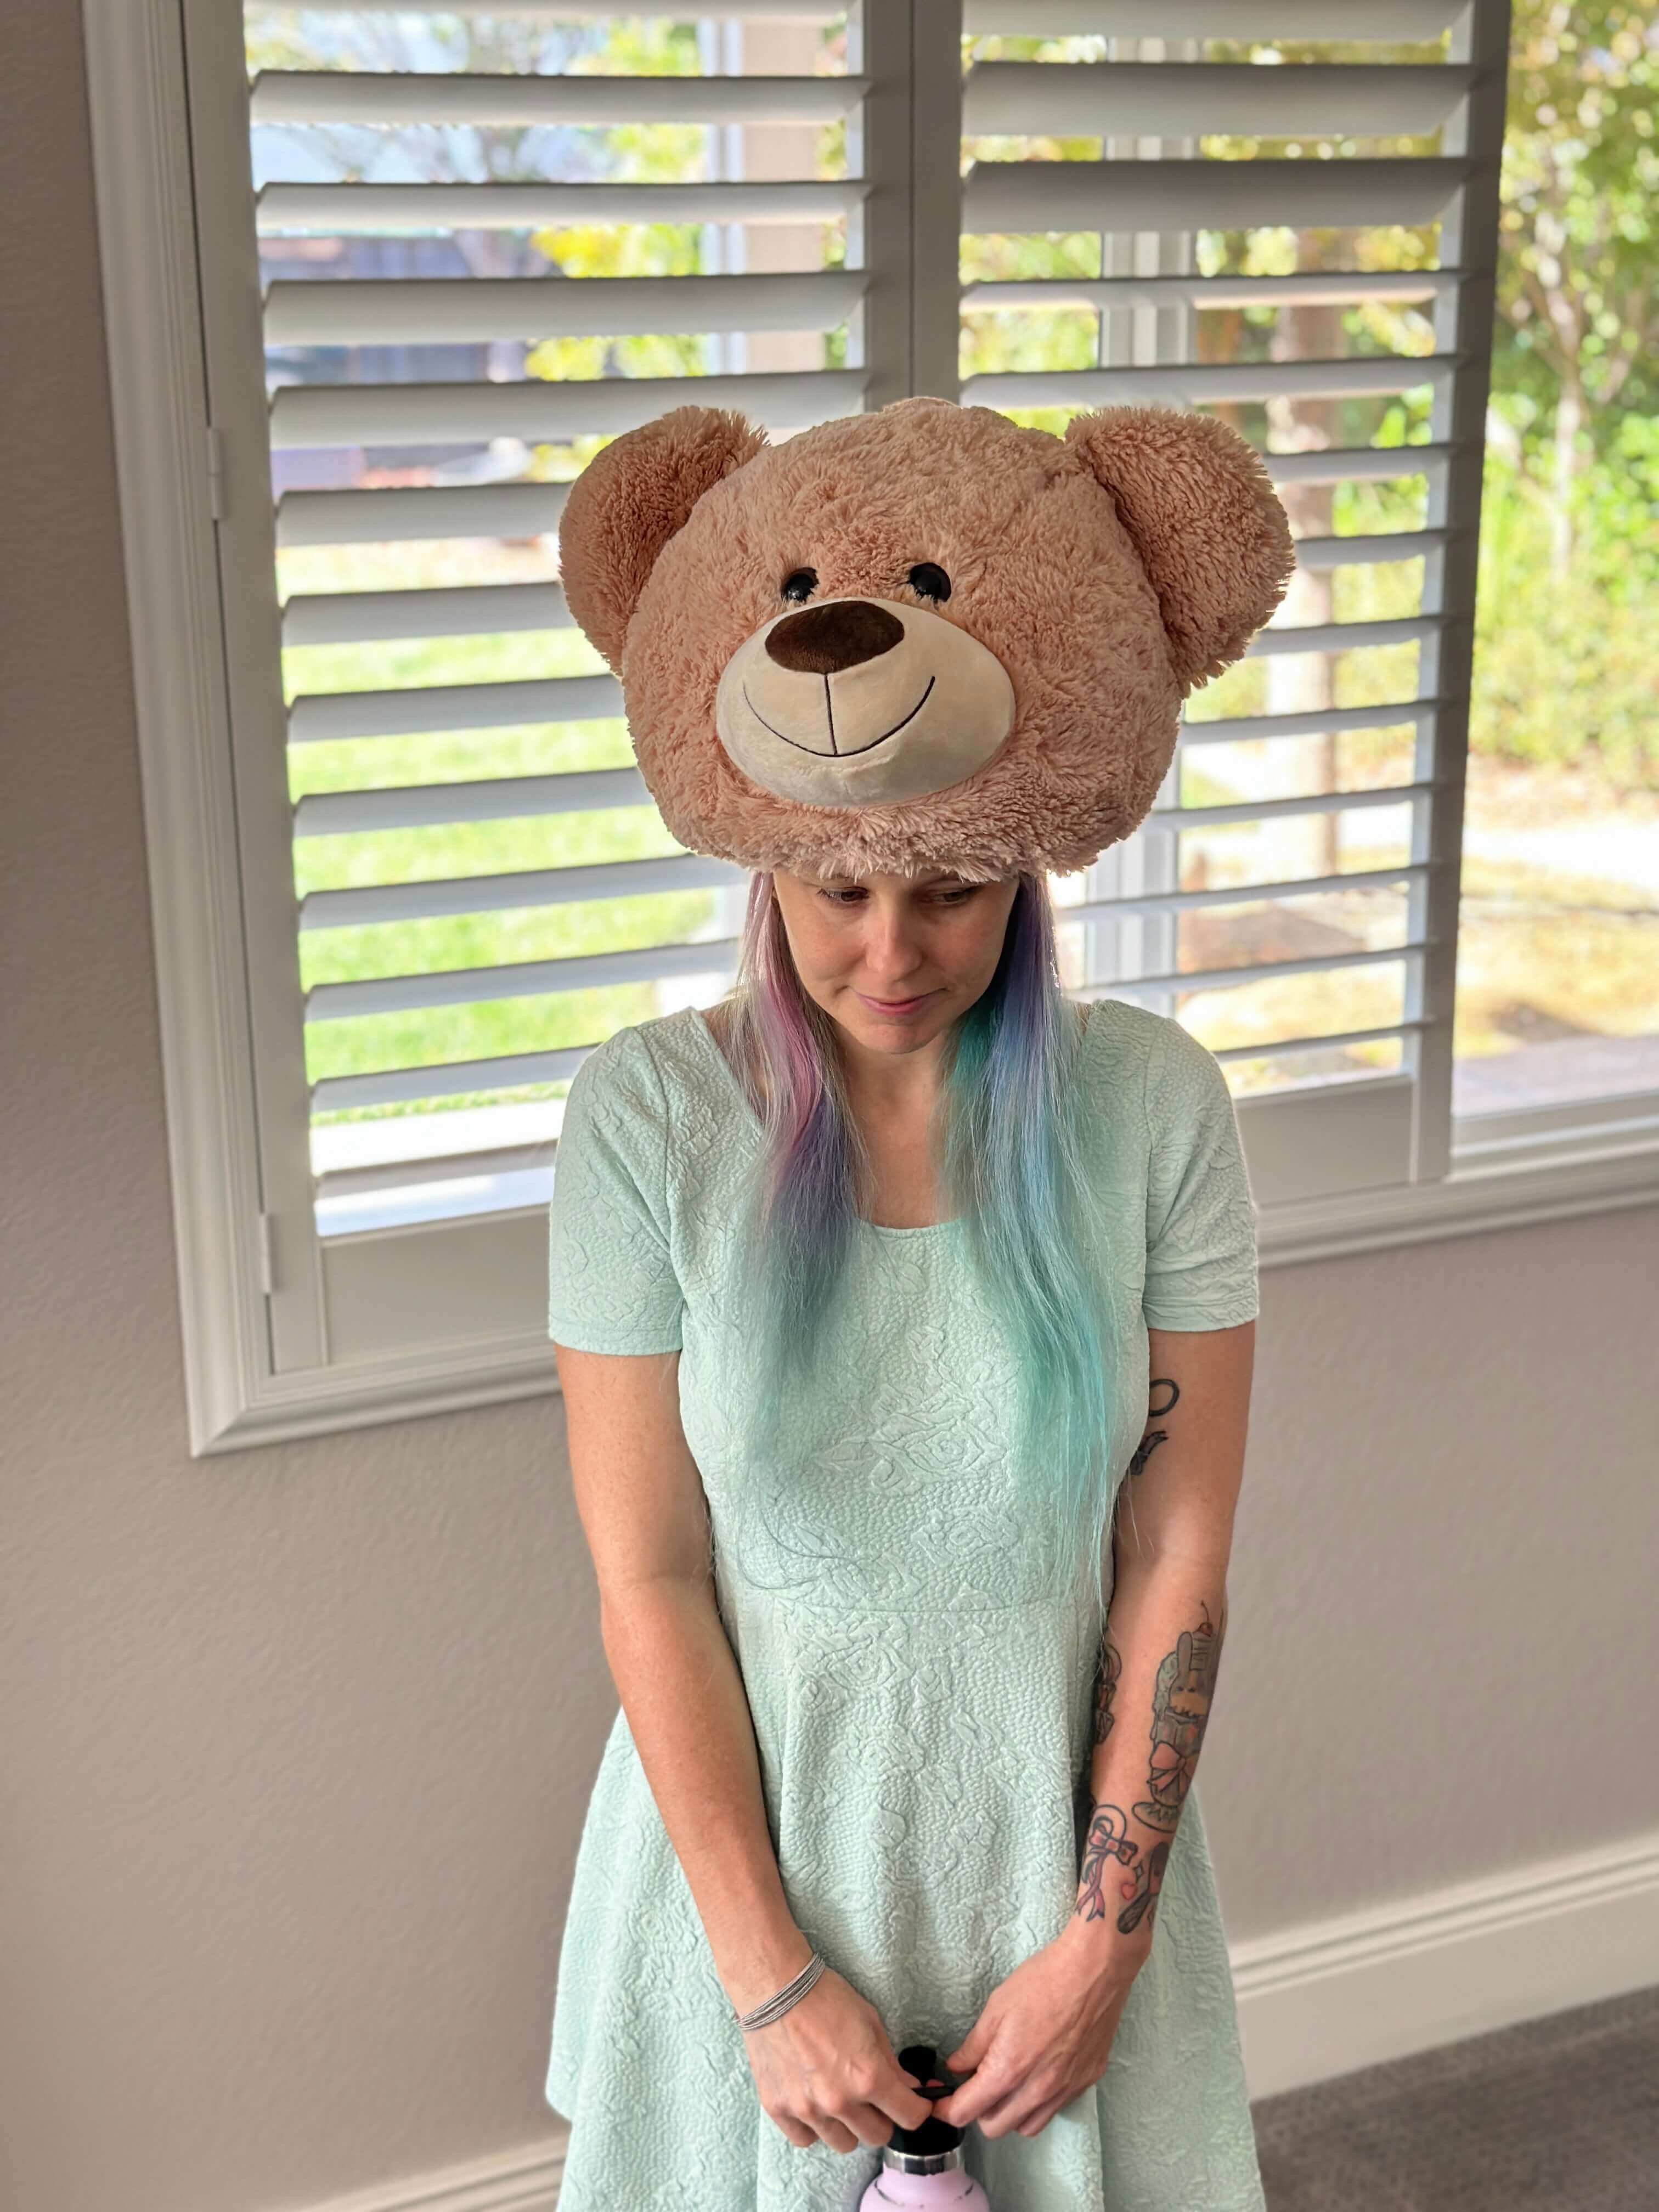
Have you always wanted to make your own one-of-a-kind cute bear hat? This fluffy bear hat with ears and a face is perfect for cosplay, Halloween, or just staying warm in the winter. This is also your chance to decapitate a bear without any of the guilt (well, there still might be a little guilt). But don’t worry, that guilt will soon dissipate when your friends start petting you because you’re so huggable and loveable now with your new custom teddy bear hat.
Table of Contents
(click the links below to skip to the section you’re looking for)
- Supplies You Need To Make Your Teddy Bear Hat
- Directions for Making a Teddy Bear Hat
- Directions for Making a Beanie to Line the Teddy Bear Hat
- Video Showing How To Make A Teddy Bear Hat
Do you ever have an idea for something you want to make and you search for it and can’t find any instructions? This was one of those situations. Krista came to me with the idea but couldn’t find a tutorial online, so that birthed the idea of this bear decapitation. I know, you might be thinking that decapitating stuffed animals isn’t very vegan of me, and you could be right. But it happened, and there are no takebacks.

This project takes 1 hour and 15 minutes to complete if you already have a beanie, and 1 hour and 30 minutes if you don’t.
Supplies You Need To Make Your Teddy Bear Hat
All you need to make a bear hat are a few things.
- A measuring tape. Sewing measuring tapes are soft and pliable, whereas a tool belt measuring tape is made of metal and does not flex easily. If you don’t have a sewing measuring tape, you can use a metal-cased one. It just won’t be as easy.
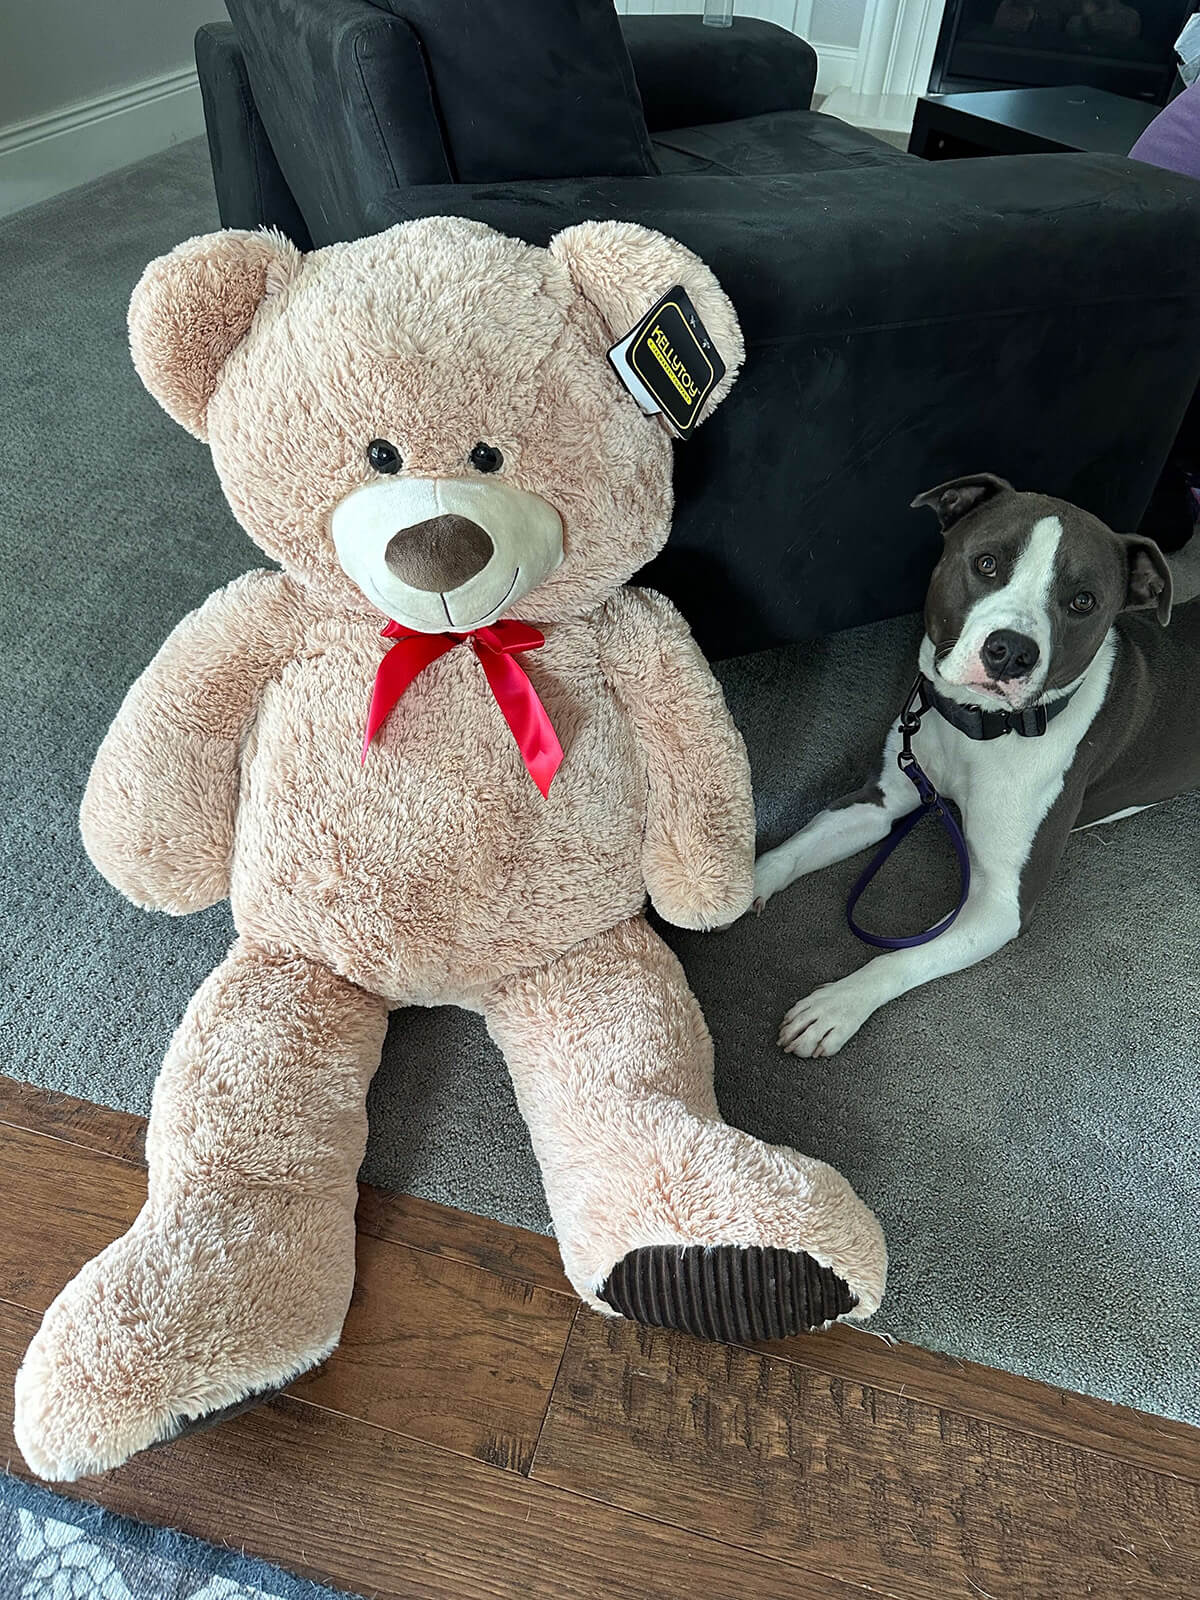
- A teddy bear. Make sure the teddy bear you purchase has a neck circumference that is close to the circumference of your head.
- An old beanie. If you don’t have an old beanie, I’ll include instructions for making one using stretchy fabric.
- Ruler. This is optional. If you don’t have one, you can use a measuring tape and a book.
- Scissors
- Thread
- Needle
Directions for Making a Teddy Bear Hat
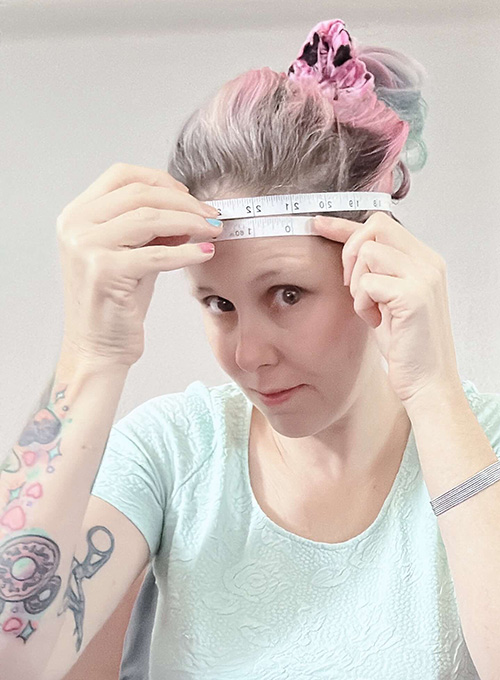
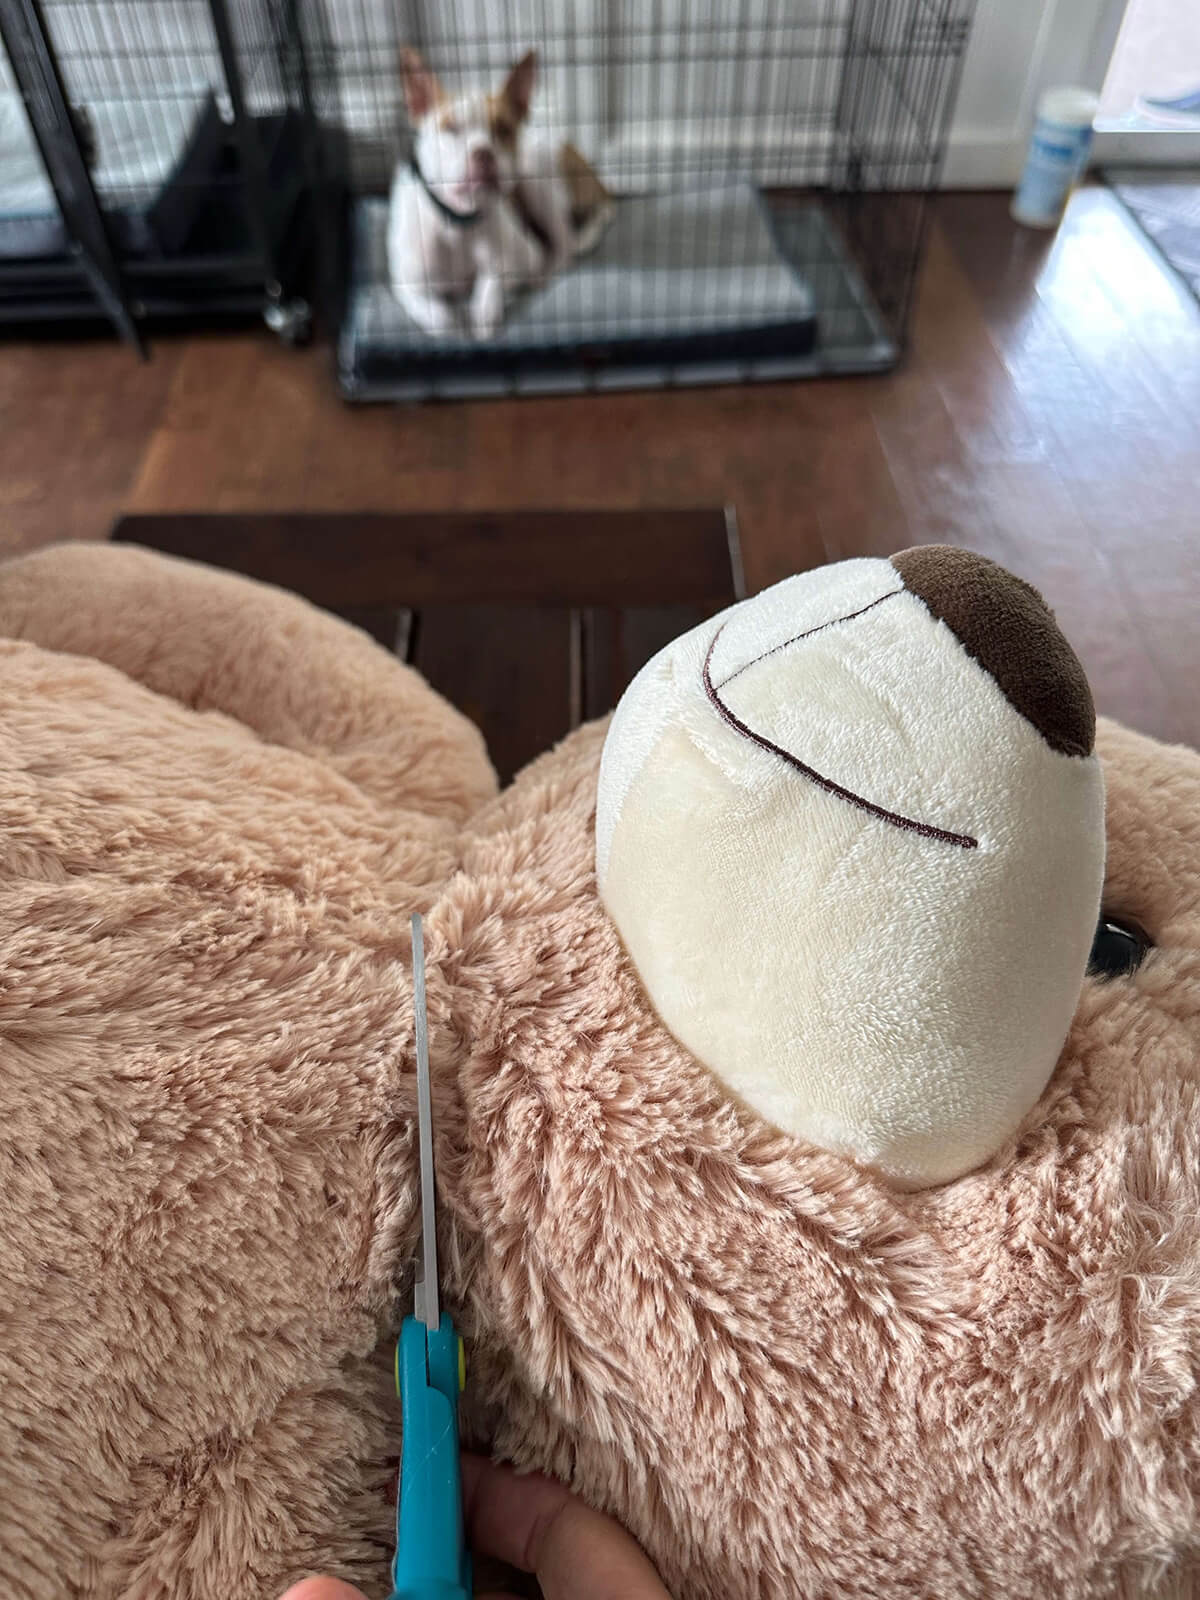
Measure the circumference of your head using a sewing measuring tape. The circumference of my head is 21 inches.
Purchase a bear that has a neck circumference the same size as your head circumference.
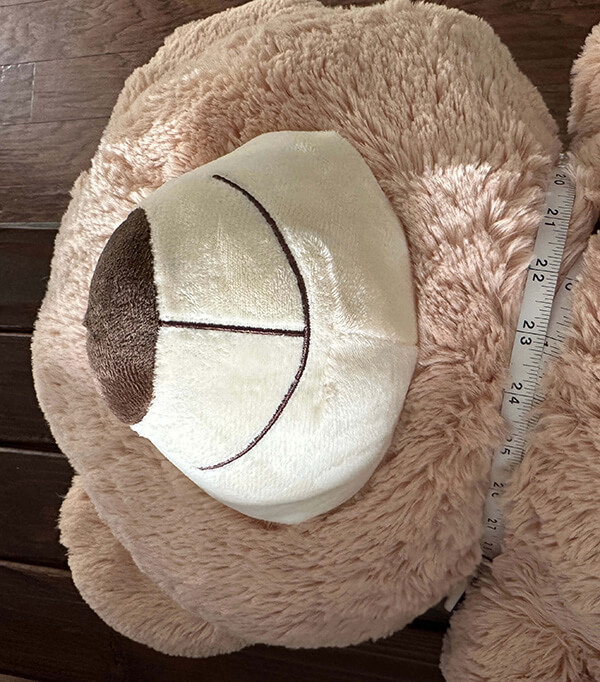
Cut the head off the bear.
Remove some of the stuffing to make room for your head.
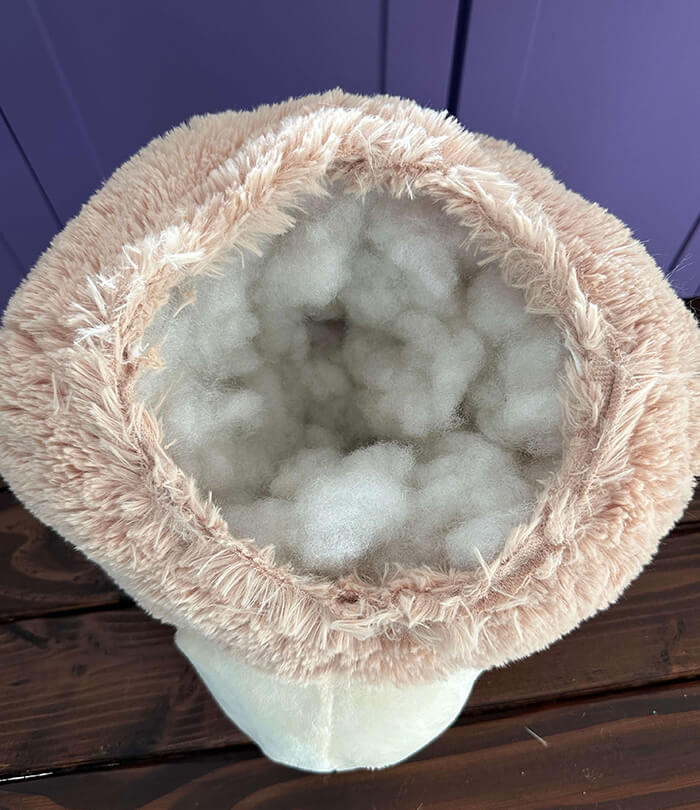
Stick your beanie inside of your bear head. If you don’t have a beanie and want to make one like I did, skip down to the beanie tutorial.
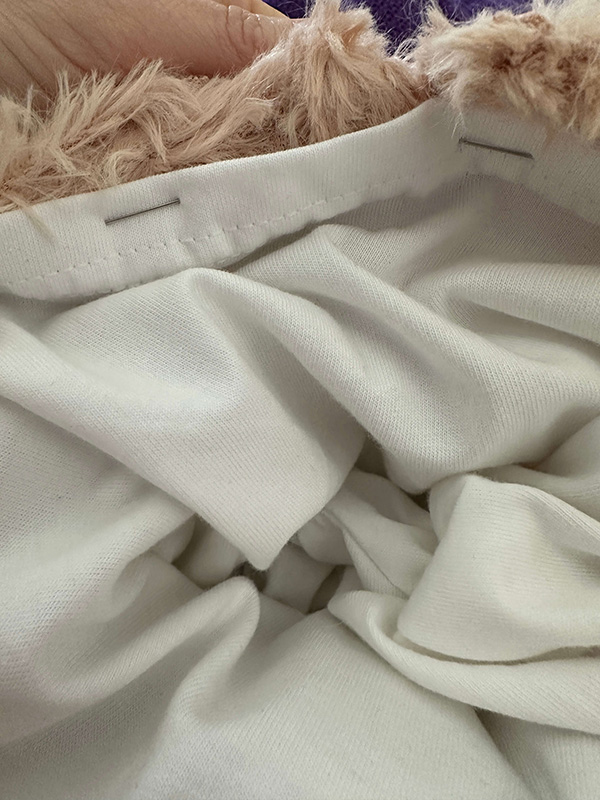
Fold the edges of the bear’s neckline over into the bear’s head. You want to fold over at least ¼ inch, but you can fold over up to ½ inch. This will keep any raw edges from coming unraveled.
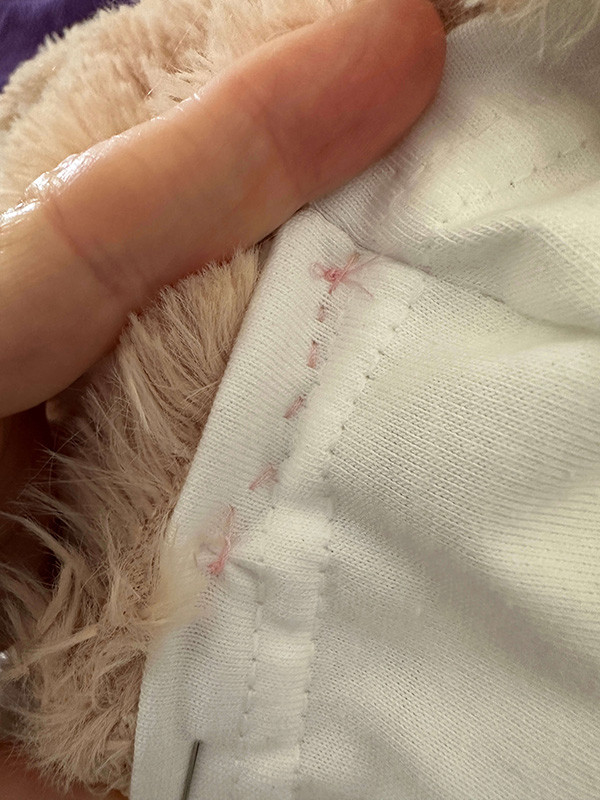
Sew the bear neck to the beanie, all the way around. I did this by hand while I watched TV, because it took over an hour. (Have you seen Wendell and Wild yet? If not, I highly recommend it.) You don’t need to use thread that matches your bear perfectly. Because the bear hat is fluffy, the fur will hide the thread color. I chose light pink, because I didn’t have beige thread.
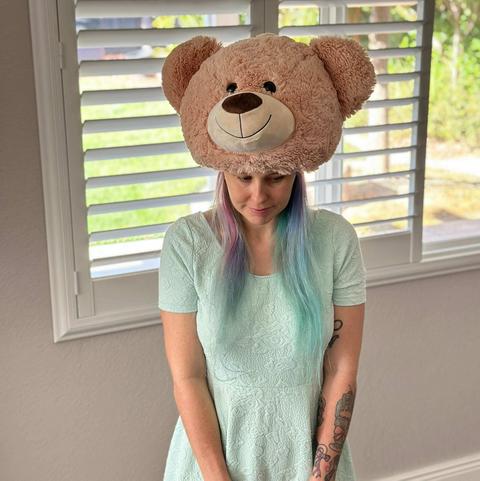
Wear your bear hat!
Directions for Making a Beanie to Line the Teddy Bear Hat
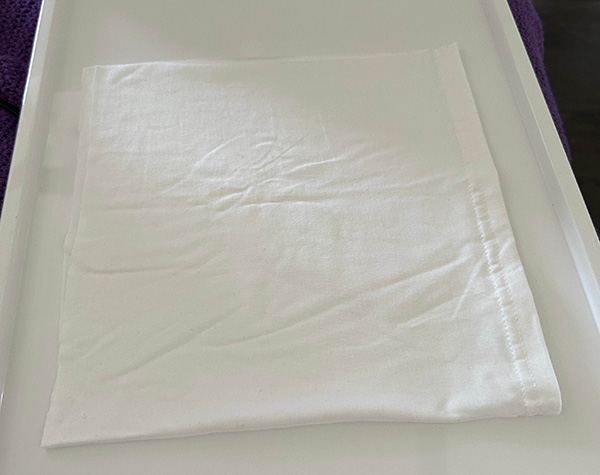
Cut a rectangle out of stretchy fabric that is 11 inches tall. Make sure the stretchy part is the longest edge (side-to-side stretch, rather than up-and-down stretch). The width should be the circumference of your head. I used an old t-shirt, so I wouldn’t have to buy fabric. My rectangle ended up being 11 inches (tall) by 21 inches (wide/long).
Fold the fabric rectangle in half so that when you measure the length, you’re measuring half of the circumference of your head (so for me, it’s 10 ½ inches folded over).
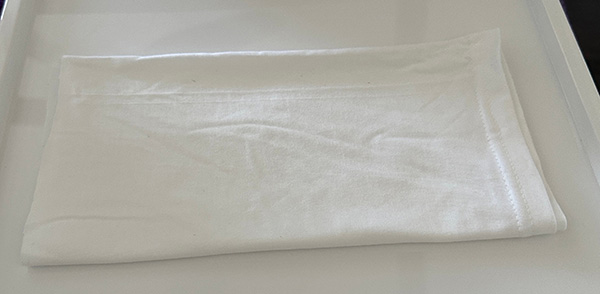
Fold it in half again, so that the fabric is now 4 layers thick, and the width/length is a quarter of the circumference of your head (so for me, it’s 5 ¼ inches).
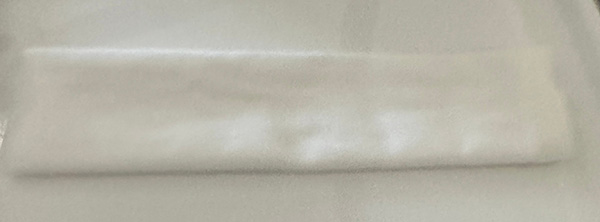
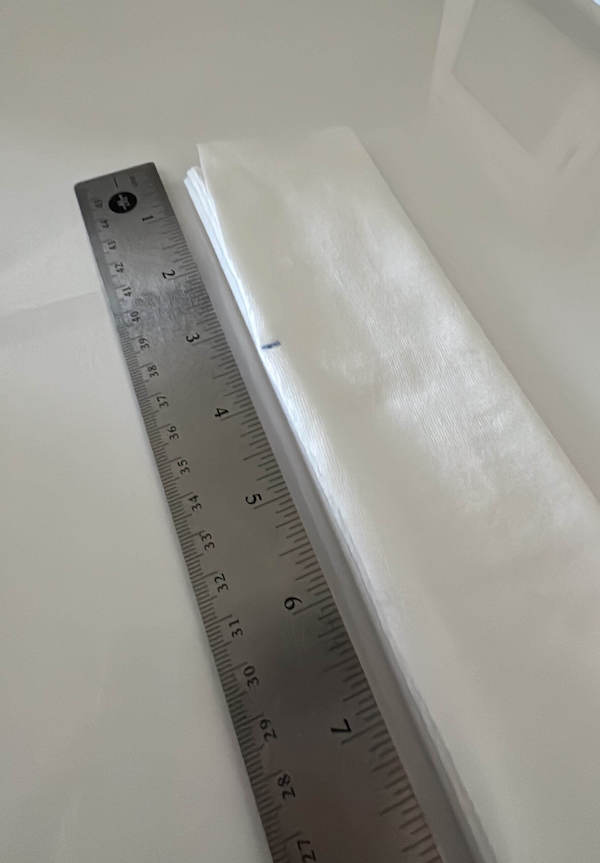
Fold it in half a third and final time so that the fabric is 8 layers thick. The width should be an eighth of the circumference of your head (so mine was a little over 2 ½ inches).
Turn this folded fabric so that the edges are on the left and the neat fold is on the right.
Measure 3 ½ inches from the top.
Mark that spot with a pen.
Draw a diagonal line from that mark to the upper right-hand corner of your strip of fabric. I used a ruler to make sure that my line was straight, but it doesn’t really have to be perfectly straight, so you can use anything you have. Or just wing it.
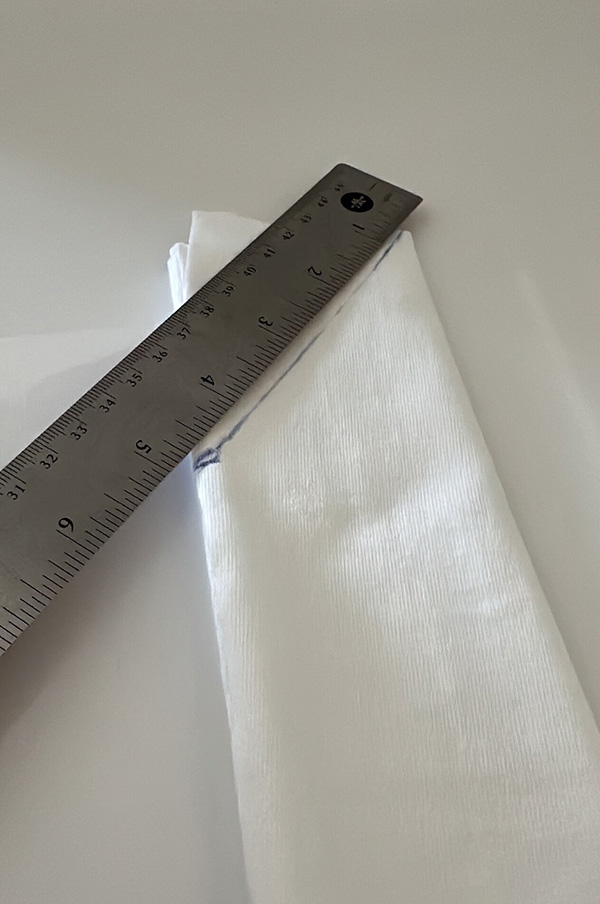
Cut along that drawn line, except when you cut, you’ll want to cut in a curved line, instead of right on the straight line. The reason for this is because your head is a little curved (unless you’re Herman Munster).
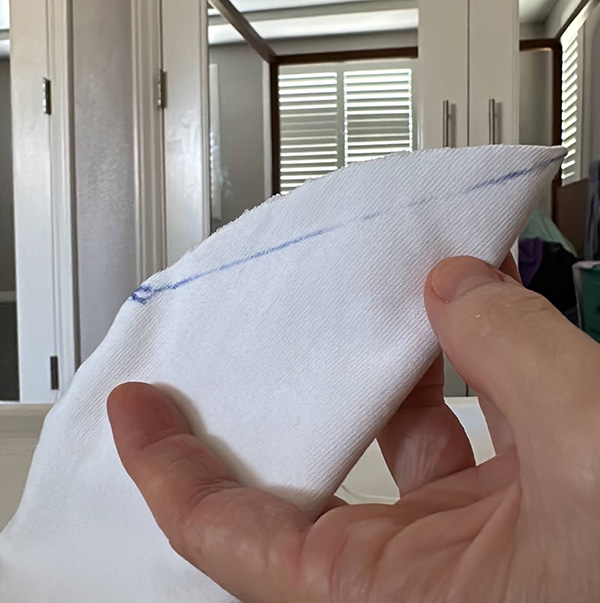
Throw away the piece you cut off.
Unfold the fabric so that it’s only folded once instead of 3 times.
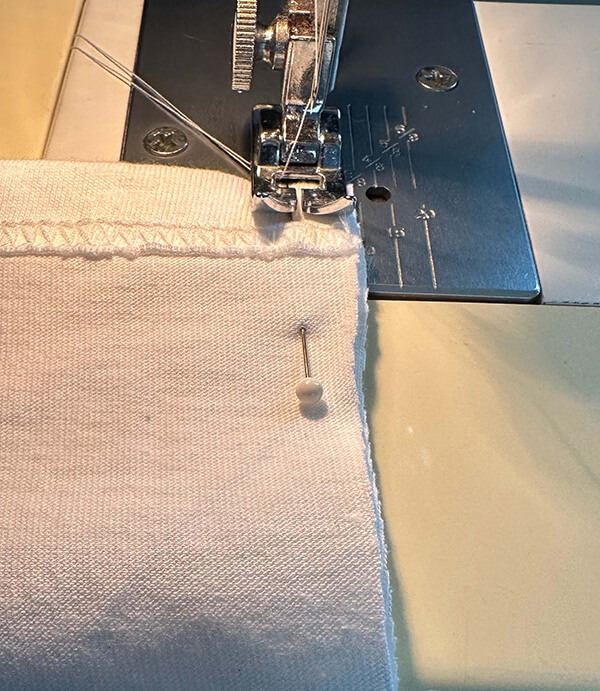
Sew up the sides, leaving the top part that looks like a V open. I started by pinning the sides that I wanted to sew, but you can skip the pinning part if you want to save time/have more sewing confidence than I do.
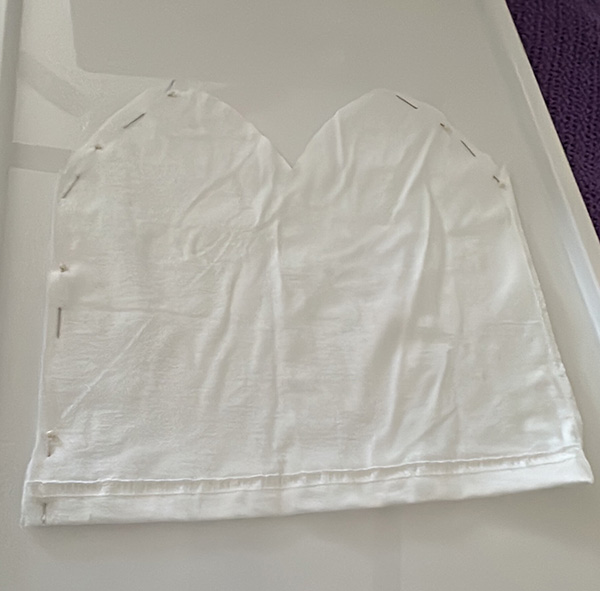
If part of your fabric is already sewn and has seams, make sure that your new seams are on the same outside of the fabric as the seams that are already there. This will keep the part of the hat that touches your skin from having seams. For instance, since I used an old t-shirt, I already had a seam on the right side of my fabric. So, when I sewed the other side, I made sure that the already existing seam was on the outside (rather than the inside). If this is confusing, watch the video below, or look closely at the photos.
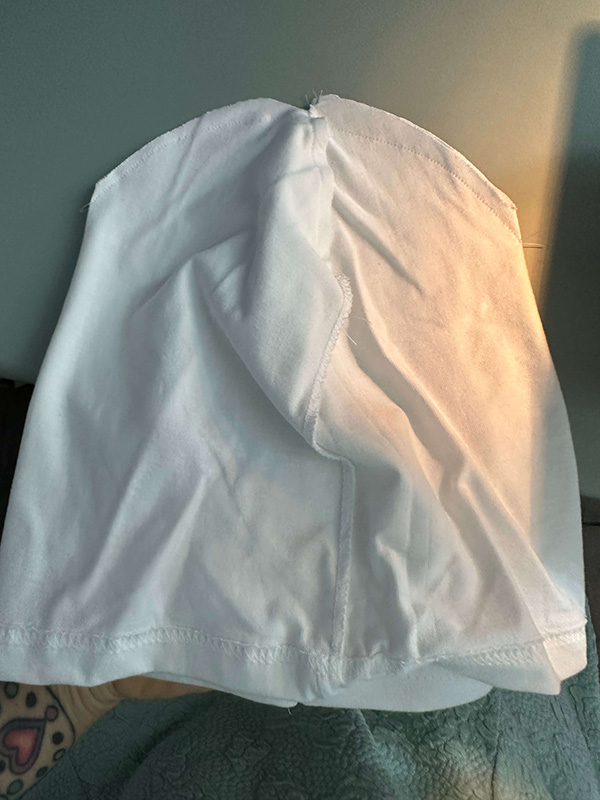
Open up the sewn tube, and press the open pieces together so that they form a slightly curved top to the hat.
Sew the curve together, closing up the top of the hat.
Optional: If you used a piece of fabric that wasn’t already hemmed on the bottom, you can make a hem on the bottom at this point. Mine was already hemmed since I used the bottom of a t-shirt. But you can also skip this and create the hem when you’re attaching the hat to the bear head.
This beanie took me 15 minutes to make.
Video Showing How To Make A Teddy Bear Hat
If you like this craft project, you might also like my stuffed unicorn hunting trophy.
☆☆☆☆☆☆☆☆☆☆
This post may contain links to items I used when I made this. This means that if you click on a button on one of those pages, you may go to a website (like Amazon) where you can purchase a product. Sometimes, I earn money from that purchase from the affiliate partner. I never recommend a product that I don’t use and endorse myself. Read more about this in my privacy policy.
☆☆☆☆☆☆☆☆☆☆