Shuckle Pokemon Birthday Cake
published on
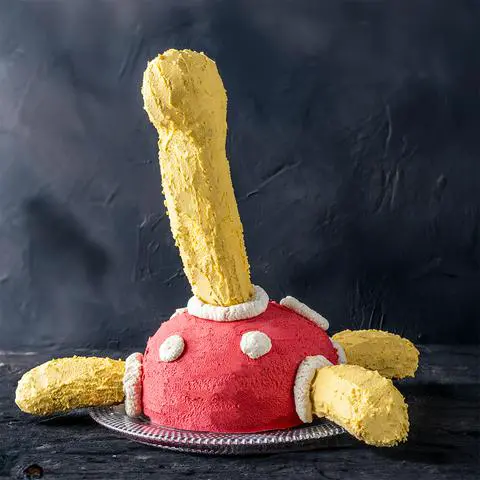
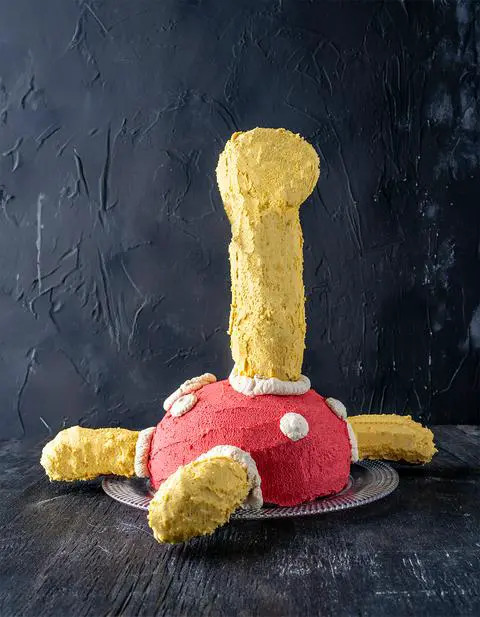
Make this rich, vegan chocolate cake that’s shaped like Shuckle. It features chocolate rice krispie treat limbs and is perfect for a Pokémon-themed birthday.
This recipe makes 1 vegan Shuckle cake that can serve 16 people.
Table of Contents
(click the links below to skip to the section you’re looking for)
- Vegan Chocolate Cake
- Vegan Frosting Recipe
- Vegan Rice Krispie Treat
- Shuckle Cake Decoration
- Ingredient Substitutions
- Video
- Contact Me with Questions
- Similar Recipes
♫ Listening to ♫
Pallet Town by Free Throw
Do you have a favorite Pokémon? Zen’s favorite is Shuckle, so I made this cake for her birthday. No, it wasn’t her 6th birthday like you may think. It was her 26th birthday. I guess you never grow out of Pokémon.
This cake had some structural challenges that I have never before encountered when making a cake. Keeping that neck up took a couple of tries, but now lucky for you, I worked out the kinks so you’ll make it perfectly your first time.
How to Make Layers of Vegan Chocolate Cake
prep time: 44 min | bake time: 1 hour 10 min
Dollhouse Shortcut
To save time, make all the batter at once and bake it all in the oven at the same time. You need multiple cake pans in order to do this though.
Bake 3 or 4 round vegan chocolate cakes. I used my ding dong cake recipe and doubled it. Since I only have two 8-inch cake pans, I made a batch one night and then made another batch the next night, so I ended up with 4 cake layers. You only need 3 layers of cake to make this shuckle cake, so if you’re good at math, you can make 1.5 times the recipe. The downside to that method is that you won’t have an extra cake layer for yourself.
Cool the cakes for about 15 minutes on cooling racks. Then flip them upside down over the cooling racks.
Cool the cakes completely for 2-3 hours, until when you touch the center of the bottom of the cake pans, they no longer feel warm at all. If you don’t have that kind of time, stick them in the freezer and they’ll cool much faster.
Remove cooled cakes from pans (if they haven’t fallen out on their own) by shimmying a baking spatula around the edges of the cake pans.
Wrap each cake in cling wrap, and freeze them. If they’ll be in the freezer for more than a couple of days, place the cakes in a ziplock freezer bag after wrapping them in plastic wrap.
Ingredients needed for the Arms, Legs, Neck, and Head for the Shuckle Cake
(jump to the substitutions section to see ingredient details and suggestions for substitutions)
- ¼ cup (56g) vegan butter or margarine
- ¼ cup (44g) vegan chocolate chips
- 1 package (10oz/283g) of vegan marshmallows
- 5 cups (210g) vegan rice krispies
How to Make the Rice Krispie Treat Parts of the Shuckle Cake
prep time: 40 min | cool time: 1 hour
If you’ve never made rice krispie treats before, check out my rice krispie treat lollipops for more information on how to do this.
Combine the first 3 ingredients in a microwave safe bowl. I used a large glass bowl so I would have extra room for mixing. The ingredients are ¼ cup (56g) vegan butter or margarine, ¼ cup (44g) vegan chocolate chips, and 1 package (10oz/283g) of vegan marshmallows.
Microwave for 30 seconds. Stir. Repeat. I did this for a total of 1 and a half minutes in 30-second intervals. As soon as I stirred and the marshmallows started losing their shape, I knew it was ready.
Pour 5 cups (210g) vegan rice krispies into the melted marshmallow mixture and stir until there are no more loose rice krispy cereal pieces.
Shape the rice krispie mixture into 5 shapes: 4 legs and a head/neck.
Stick bamboo skewers into each one so that you can stick them into the cake later. I needed 2 skewers for the neck because it was so heavy that it fell down with just one skewer.
Chill the shapes in the fridge for an hour.
Ingredients for Vegan Chocolate and Vanilla Buttercream Frosting
(jump to the substitutions section to see ingredient details and suggestions for substitutions)
- 3 cups (674g) vegan butter or margarine
- 2 teaspoons (8g) vanilla
- 8 cups (960g) organic powdered sugar
- ⅓ cup (36g) cocoa powder
- vegan food coloring
How to make Vegan Chocolate and Vanilla Buttercream Frosting
prep time: 30 min
Beat 3 cups (674g) vegan butter or margarine until it’s light and fluffy. I used my stand mixer fitted with the paddle attachment and set it to high speed. You can use a handheld electric mixer, if that’s all you have. Mix for 2 minutes.
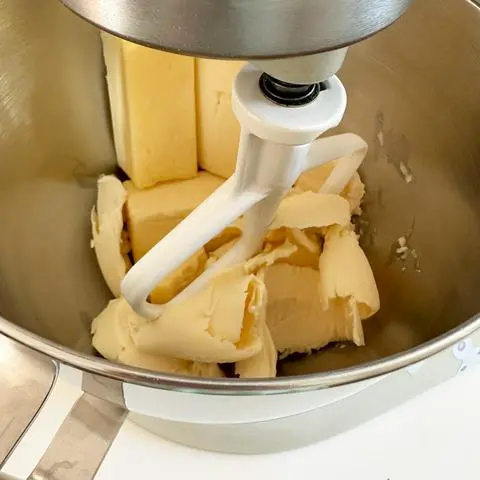
Stop the mixer after a couple minutes and use a silicone spatula to scrape the sides and bottom of the mixer bowl. Mix for 2 minutes.
Add 2 teaspoons (8g) vanilla. Scrape the sides and bottom of the mixer bowl. Mix for 2 minutes. Check the consistency at this point. You’re looking for a super smooth and shiny and fluffy consistency. You don’t want any lumps whatsoever. So keep mixing until those are gone. Mixing could take up to 10 minutes if your ingredients were in the coldest part of your fridge.
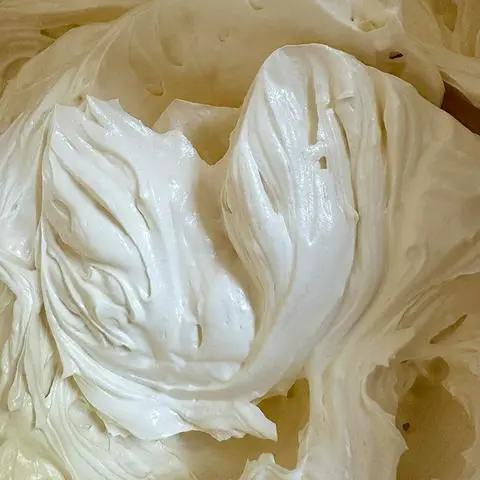
Sift in 8 cups (960g) organic powdered sugar, a cup at a time. Mix and scrape the sides and bottom of the bowl with a baking spatula after each cup of powdered sugar.
Transfer ¾ of the frosting to another bowl, cover it, and save it for decorating the cake.
Sift ⅓ cup (36g) cocoa powder into the remaining frosting and mix again to make your chocolate buttercream.
Stop the mixer and scrape the sides and bottom of the mixer bowl. Mix for 1 more minute.
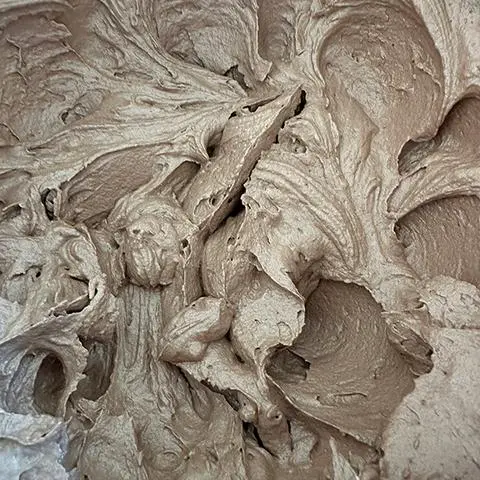
Transfer the chocolate buttercream to a different container.
Wash and dry the mixer and paddle attachment.
Return the white frosting back to the mixing bowl.
Sift a cup (120g) of organic powdered sugar into the white frosting, and mix until creamy.
Fill a small piping bag fitted with tip 1A ⅔ of the way with white frosting.
Divide the rest of the frosting in half.
Color half of the remaining frosting yellow and half red. Make sure you use vegan food coloring.
If you use gel colors, you can mix those into the frosting by hand because they incorporate easily. If you use all-natural colors, you may need to use the electric mixer.
I used Nature’s Flavors liquid yellow and Exberry powdered red for the other half. I was able to mix in the liquid yellow by hand easily. The Nature’s Flavors red didn’t work. I needed so much to get a true red that it separated and ended up looking like an oil spill. It was a cool aesthetic, so I should keep it in mind for a future project. So, for darker hues, I recommend using powdered coloring if you’re working with all natural coloring.
How to Assemble and Decorate the Shuckle Cake
assembling the cake: 10min | decorating the cake: 2 hours
Level your cakes if they aren’t flat on top. Do this by using a long bread knife and slicing any parts off the top that are keeping the top of the cake from being flat.
Assemble the cake by centering one cake layer onto a cake plate or a cake board.
Spread chocolate frosting on the top of the bottom cake layer. You can use a cake turntable or cake spinner if you have one, but I didn’t use one and it was fine. I use an 8" offset spatula to spread frosting, but if you don’t have one, just use a baking spatula or a butter knife.
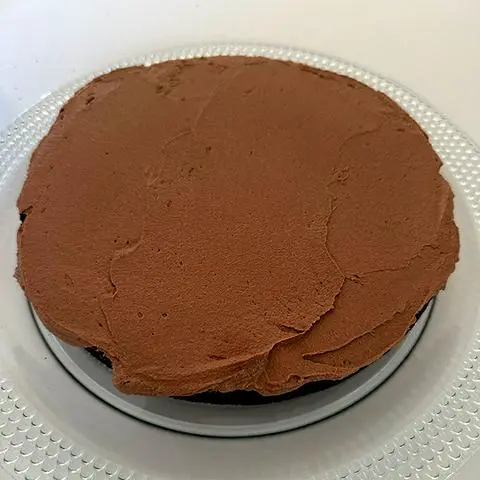
Set the second cake layer on top, trying to line it up perfectly with the bottom layer.
Spread more chocolate frosting on the top of the second cake layer.
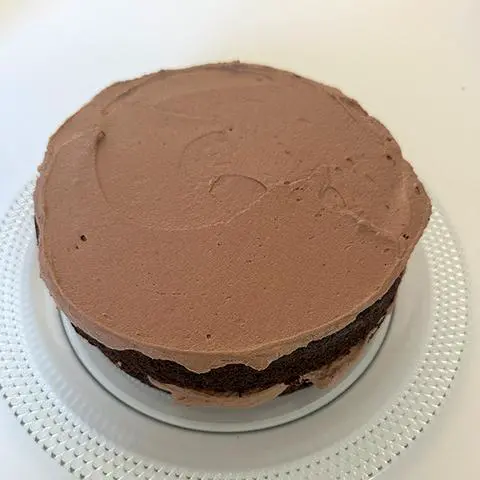
Set the third and final cake layer on top, trying to line it up perfectly with the other 2 layers.
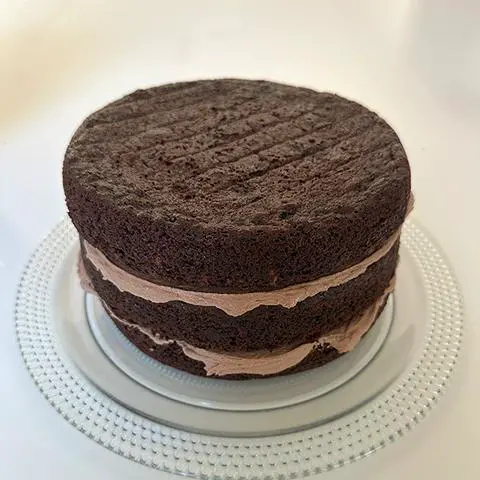
Stick a skewer in the cake (through all 3 layers) and freeze it for 20-30 minutes. This will help it not fall apart when you try to carve it into a turtle shape.

Remove the 3-layer chocolate cake from the freezer when you’re ready to carve it. If you left it in the freezer too long, it will be slightly harder to carve, but you can do it. It will just take a little longer.
Carve the cake into the shape of Shuckle’s body.
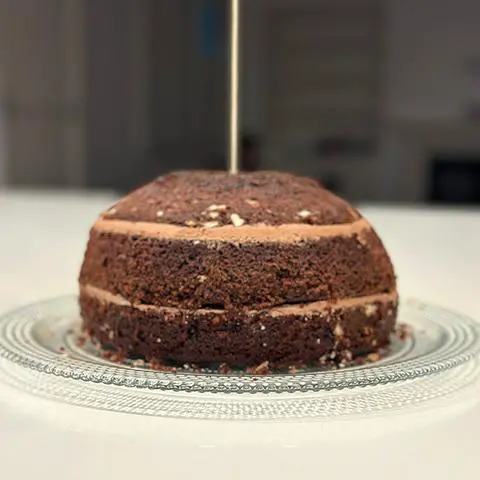
Remove the skewer and frost the cake with chocolate frosting. This will be the crumb coat, so don’t worry if the frosting gets cake crumbs in it.
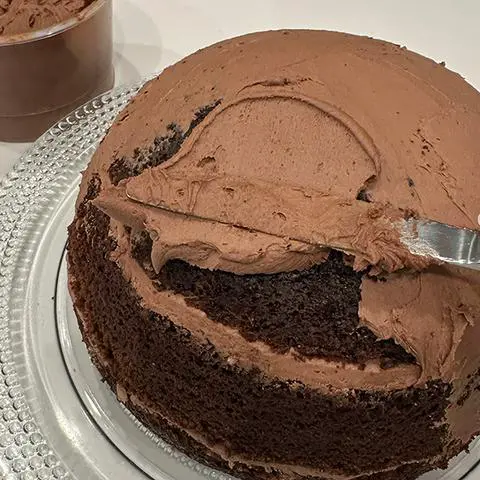
Freeze the crumb coat for 20 minutes.
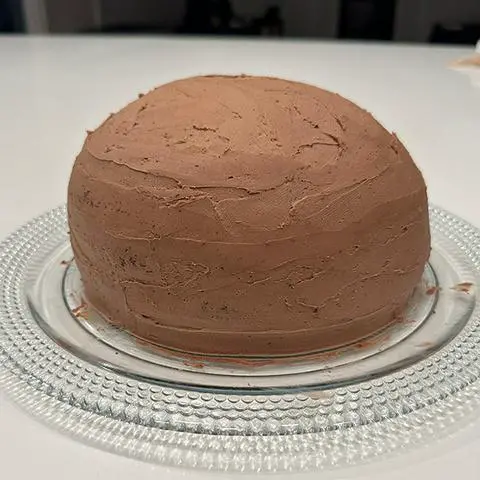
Frost the cake with red frosting.
Add the head, arms, and legs to the body by sticking the skewers into the cake body.
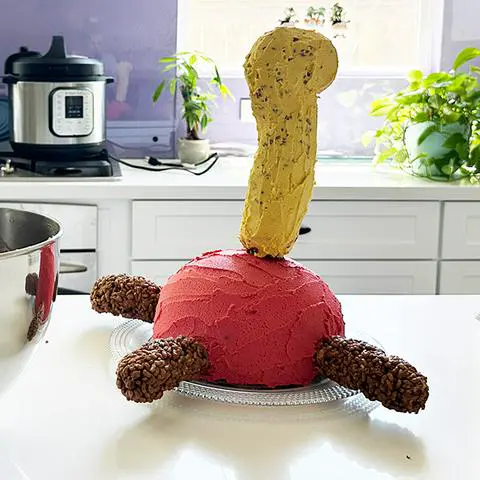
Cover the head, arms, and legs with whatever frosting color you have the most of. For instance, if you still have chocolate frosting left, use that. But if you’re out of chocolate frosting, use red frosting since you’re all done with that color. This is just to smooth out the bumpiness of the rice krispie treat limbs. I used a 4" offset spatula.
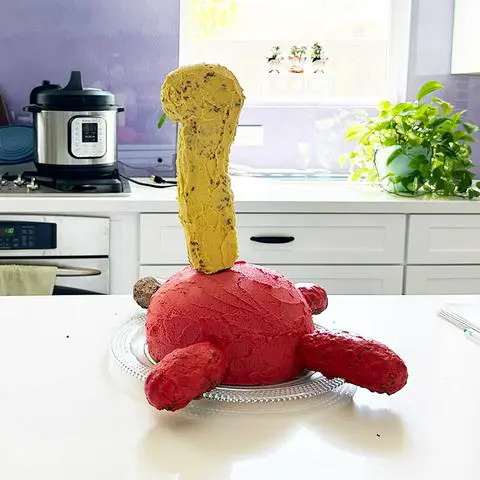
Chill the cake to harden the first coat of frosting. It may not fit in your freezer at this point, so use the fridge.
Frost the limbs with the final coat of yellow frosting.
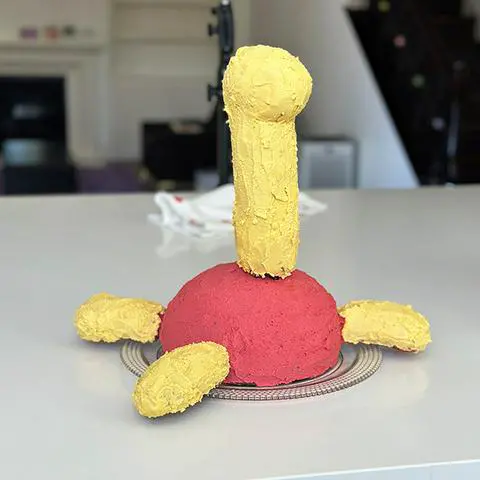
Pipe the white rings using the white frosting you prepared earlier.
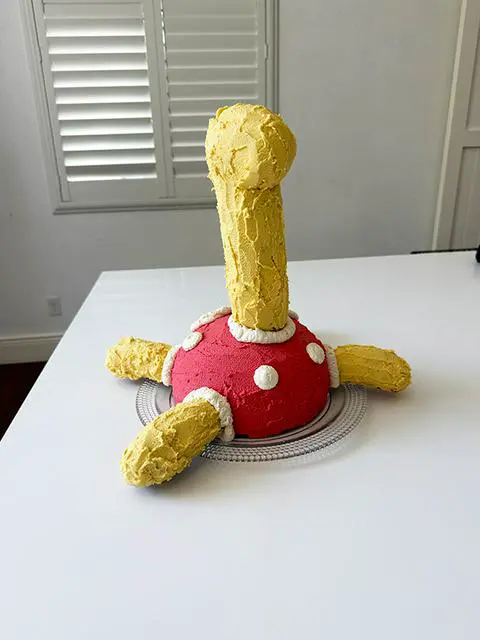
I stopped here, but if I were making this again, I would color some leftover frosting black and draw eyes on his head.
Ingredient Substitutions
- Vegan Butter: You can replace up to half of the vegan butter or margarine in the frosting with vegan shortening.
- Organic Powdered Sugar: I have a whole blog post about how to know if powdered sugar is vegan. If you stick with organic powdered sugar, you’ll be fine. I like the 365 brand from Whole Foods or the one from Trader Joe’s because they’re affordable.
- Vegan Food Coloring: I have a whole webpage of different types of vegan food coloring.
- Vegan Rice Krispies: I used One Degree cocoa krispies in this recipe, but you can use any kind, as long as it’s vegan. To make sure your rice krispies are vegan, scan the ingredients for D3. Vitamin D3 can sometimes be from animals.
Video
Comments or Questions?
If you make this pokemon cake recipe, I would love it if you’d snap a pic, post to instagram, and tag me @vegandollhouse. It seriously makes my day/week/month!
Please message me (instagram or email) if you have any questions or feedback about the recipe.

Similar Recipes
If you like this shuckle cake recipe, you might also like my pikachu cake and my snorlax cake. The Pikachu cake is a chocolate and vanilla marble cake. The Snorlax cake is a lemon blueberry cake.
For other pokemon foods, check out my pokemon category of recipes.
☆☆☆☆☆☆☆☆☆☆
This post links to items I mention. If you click on one, you will go to a website (like Amazon) where you can buy the product. Sometimes, the store you purchase from (Amazon, Etsy, etc.) will pay me for referring you. This costs you nothing extra, and I would never recommend a product that I don’t use. These affiliate programs help me buy ingredients to create recipes for you. Read more about this in my privacy policy.
I mostly cook with organic ingredients, but only specify organic when it’s necessary to ensure the item is vegan.
☆☆☆☆☆☆☆☆☆☆


Rating:⭐⭐⭐⭐⭐
JEEROFUKU -⭐⭐⭐⭐⭐ roetken -⭐⭐⭐⭐⭐ OvipositingMoth -⭐⭐⭐⭐⭐ PokeLady_24 -⭐⭐⭐⭐⭐ wink047 -⭐⭐⭐⭐⭐ ThePrincessAK47 -⭐⭐⭐⭐⭐ Anoniname -⭐⭐⭐⭐⭐ Mitphira -⭐⭐⭐⭐⭐ mesphira -⭐⭐⭐⭐⭐ acr3119 -⭐⭐⭐⭐⭐ _Mimick_ -⭐⭐⭐⭐⭐