Pokemon Cake
published on
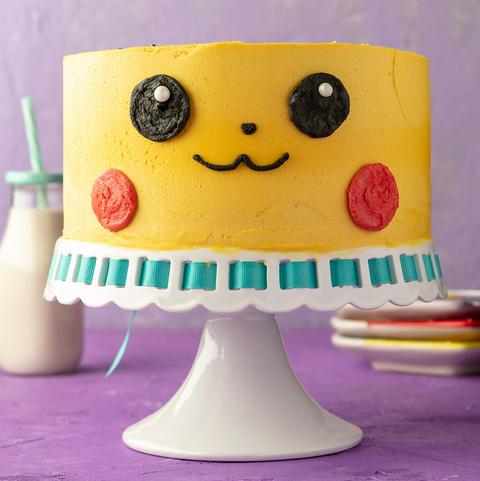
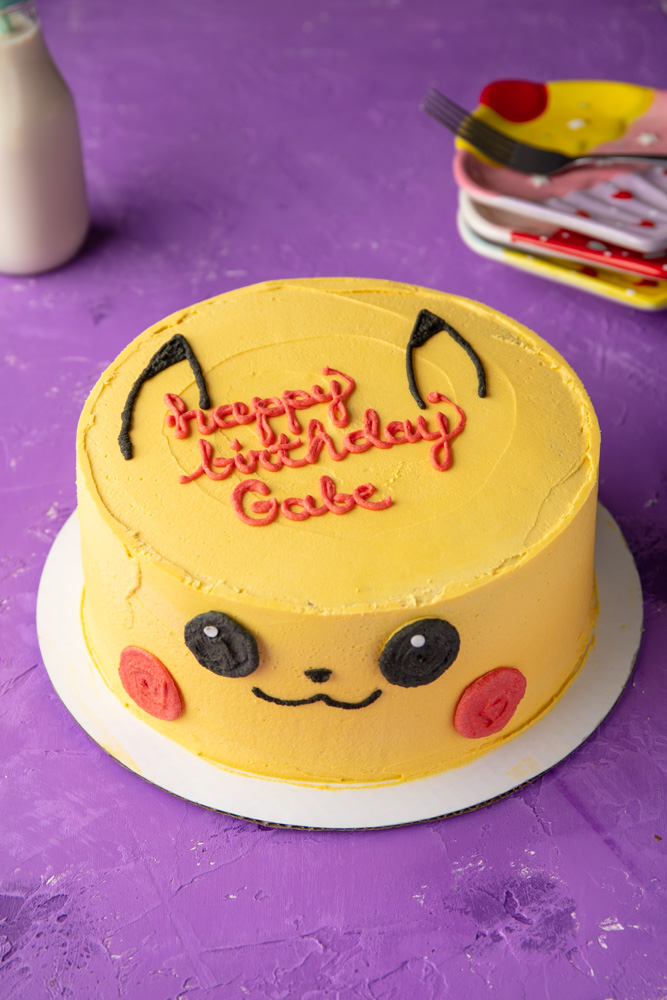
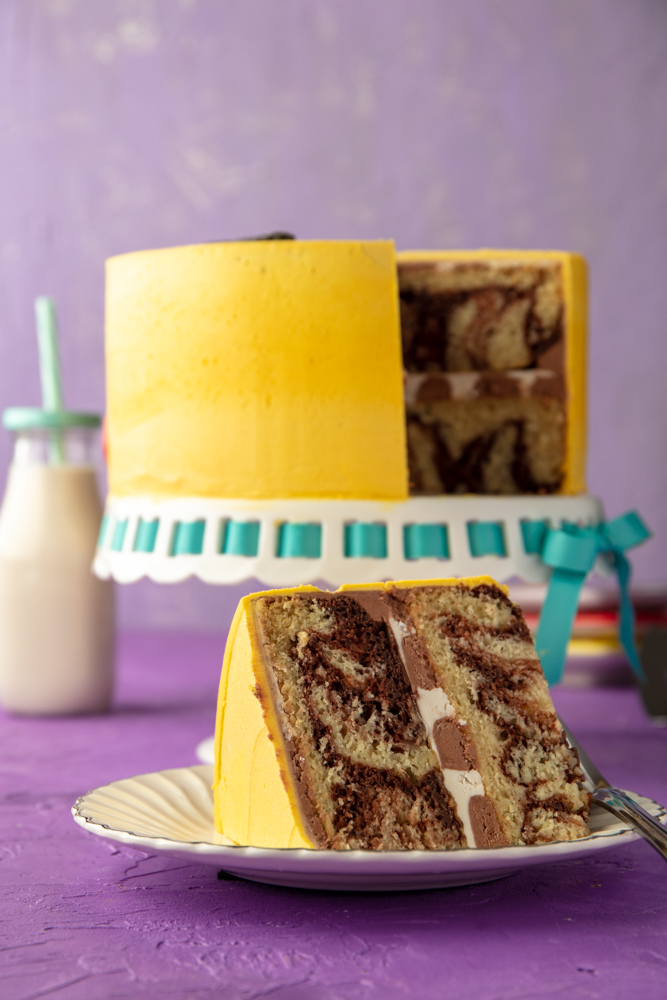
This light and fluffy pokémon cake is a vegan chocolate and vanilla marble cake with buttercream frosting. The cake has both chocolate and vanilla vegan frosting swirled together, and then it’s decorated to look like pikachu. This pikachu cake would be a perfect cake idea for a cute pokemon-themed birthday party, or you can skip the decoration and just make a grown-up marble cake.
This marble cake recipe makes a 2-layer 8” or 9” round pikachu marble cake (16 pieces of cake).
Table of Contents
(click the links below to skip to the section you’re looking for)
- Marble Cake Recipe
- Vegan Frosting Recipe
- Pokemon Cake Decoration
- FAQ
- Substitutions
- Video showing the making of the marble cake
♫ Listening to ♫
Easy by Claud
I posted an instagram poll asking how swirled marble cake should be, and this was the winner. If you like this marble cake recipe, check out my other cake recipes. For other pokémon cake ideas or pikachu recipes, check out my pokémon recipes. If you can’t decide between a chocolate cake and a vanilla cake for your birthday, then this is the cake for you.
Vegan Marble Cake Ingredients
(jump to the substitutions section to see ingredient details and suggestions for substitutions)
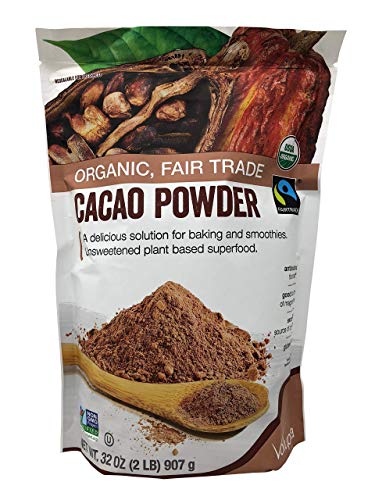
- ¼ cup (18g) cocoa powder
- ¼ cup (60g) hot water or hot coffee
- ⅔ cup (135g) safflower oil
- 1 ¾ cups (415ml/415g) nondairy milk
- 1 ⅓ cups (300g) organic sugar
- 2 teaspoons (8g) vanilla extract
- 3 ½ cups (455g) flour
- 1 ½ teaspoon (9-10g) baking soda
- ½ teaspoon (2-3g) baking powder
- 3 pinches of salt (optional)
- 4 ½ tablespoons (67g) lemon juice
Vegan Marble Cake Directions
Prep time: 35 minutes | Bake time: 40 minutes
Dollhouse Shortcut
Bake the cakes ahead of time and wrap them in cling wrap once they’ve cooled completely. Chill in the fridge for up to 3 days or put the wrapped cakes into a freezer ziplock bag and freeze for up to 3 months.
Cut two circles out of parchment paper and set them in the bottoms of each of the 8” or 9” round cake pans. I have a template made out of cardstock* that I use as my template whenever I have to cut out parchment paper circles for my cake pans. It saves time, and it’s a lot cheaper to cut your own than to buy the precut circles.
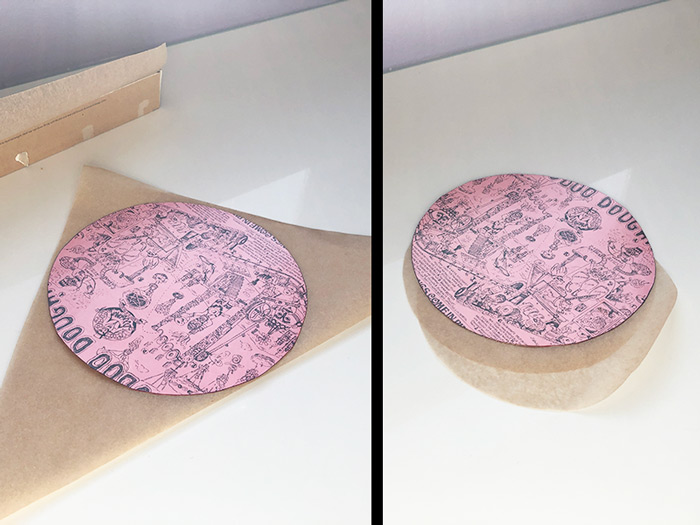
* Okayyyyyy, it’s actually from an upcycled doughnut box—don’t act like you haven’t figured out by now that I have sweet tooth.
Preheat the oven to 335ºF (170ºC).
Whisk ¼ cup (18g) cocoa powder (try to buy fair trade, if possible) with ¼ cup (60g) hot water or hot coffee. Set aside to cool.
Mix the following wet ingredients in the mixing bowl of a stand mixer fitted with a paddle attachment: ⅔ cup (135g) safflower oil, 1 ¾ cup (415g) nondairy milk (if you use soymilk, make sure it’s organic or non-GMO), 1 ⅓ cup (300g) sugar, and 2 teaspoons (8g) vanilla extract (if your nondairy milk is vanilla flavored, use only one teaspoon of vanilla extract). You can use a handheld electric mixer if you don’t have a stand mixer (or even just mix by hand if you like a kitchen workout).
Sift the following dry ingredients into a separate bowl: 3 ½ cups (455g) all-purpose flour, 1 ½ teaspoon (9-10g) baking soda, ½ teaspoon (2-3g) baking powder (I use the non-aluminum kind, because I need all the brain cells I have left), and 3 pinches of salt (salt is optional). Whisk them together.
Divide the lemon juice into two ramekins, cups, or small bowls: 3 tablespoons (45g) in one bowl and 1 ½ tablespoons (22g) in the other bowl. See the substitutions section below for alternatives.
Combine the wet ingredients and the dry ingredients and mix until you can no longer see any dry ingredients. I usually have to stop the stand mixer at least once to scrape down the sides and bottom of the bowl (and even the paddle) with a baking spatula to make sure no dry ingredients are left unmixed.
Divide the cake batter into 2 bowls: ⅔ of the batter in one bowl and ⅓ in the other bowl. You don’t have to weigh it. You can just guesstimate to save time.
Mix the bloomed cocoa powder (remember that mixture you made at the beginning?) to the bowl that has ⅓ of the cake batter. Stir gently until it’s all one color.
Check the oven to make sure it’s heated to 335º before this next step. If it’s not, wait for it to beep before starting the next step.
Add the 3 tablespoons (45g) of lemon or lime juice to the vanilla batter, and stir it gently by hand.
Pour ¼ of the vanilla batter into each of the 8" round cake pans and shake the cake pans a little to get the batter to spread evenly on the bottom of each pan.
Add the 1 ½ tablespoons (22g) of lemon or lime juice to the chocolate batter, and stir it gently by hand.
Pour ½ of the chocolate cake batter into each of the cake pans on top of the vanilla cake batter. Use a silicone spatula to make sure you get all of the chocolate batter out of the bowl and then smooth it out in the cake pans.
Divide the rest of the vanilla batter into both pans trying to smooth it out so that each is relatively flat on top. Use a silicone spatula to make sure you get all of the batter and don’t waste any.
Swirl the vanilla and chocolate batter together using a butter knife. See the Tips section below for the method I use to swirl.
Set all (all 2 of them, haha) the pans on the same rack in the oven (the rack that’s most in the middle). This will help them all bake at the same rate.
Bake at 335ºF (170ºC) for 38-45 minutes, or until you can stick a toothpick in the center of the cakes and it comes out clean. I baked mine for 38 minutes, but my oven runs hot.

Cool the cakes on cooling racks for 10 minutes.
Flip the cake pans upside down and set them upside down on the cooling racks to cool the rest of the way. This usually takes around an hour. The cakes often just fall out of the cake pans as they cool.


Vegan Marble Cake Frosting Ingredients
(jump to the substitutions section to see ingredient details and suggestions for substitutions)
- 2 teaspoons (8g) vanilla extract
- 1 cup (176g) vegan butter or margarine (I use organic whipped earth balance)
- ¾ cup (144g) organic palm shortening
- 4 ½ cups (540g) organic powdered sugar
- 2-4 teaspoons nondairy milk, room temp (I used organic soymilk)
- ¼ cup (18g) cocoa powder
Vegan Marble Cake Frosting Directions
prep time: 30min
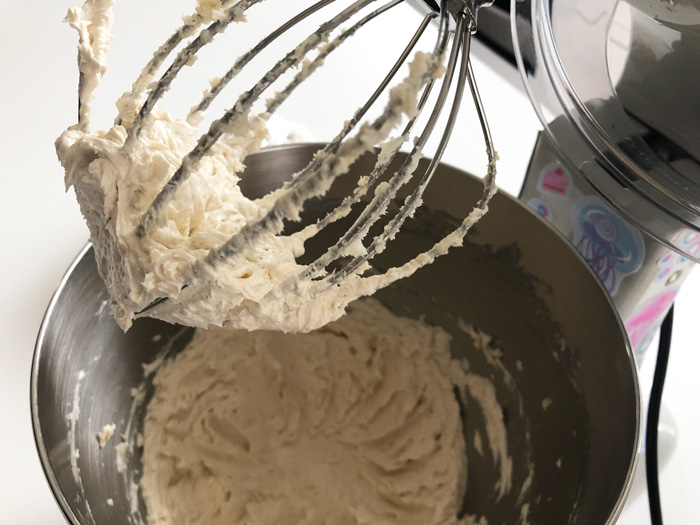
Whisk 2 teaspoons (8g) vanilla, 1 cup (176g) vegan butter or margarine, and ¾ cup (144g) spectrum sustainable organic palm shortening until it’s light and fluffy, using a stand mixer (or a handheld electric mixer) fitted with the whisk attachment and set to medium speed. It might be possible to do this by hand if you have a lot of upper body strength and time, but I don’t recommend it, unless you really have no other choice. I’d rather borrow a mixer from a neighbor who may have covid than try to make frosting without one. With an electric mixer, this step takes 3-5 minutes. By hand, it could take 20 minutes.
Stop the mixer after a couple minutes and use a silicone spatula to scrape the sides and bottom of the mixer bowl. Mix again.
Sift in 4 ½ cups (540g) organic powdered sugar, a cup at a time, mixing thoroughly and scraping the bowl with the silicone spatula between each added cup.
Add 2-3 teaspoons of nondairy milk, little by little, mixing in between each addition, until the frosting is a creamy and spreadable consistency.
Transfer ¾ of the frosting to another bowl.
Sift ¼ cup (18g) cocoa powder into the remaining frosting and mix again to make your chocolate buttercream. You may need to add a teaspoon of nondairy milk to get it back to the right consistency.
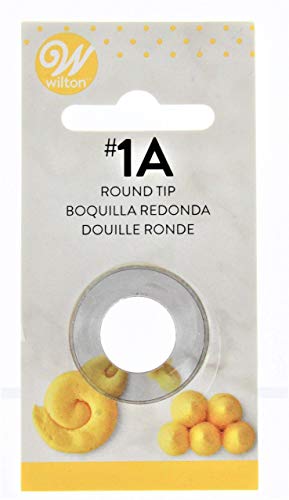
Fill a piping bag fitted with a Wilton Large Round Tip 1A (or no tip) with the chocolate frosting.
Fill a piping bag fitted with a Wilton large round tip 1A (or no tip) with ⅓ of the vanilla frosting that you took out of the bowl.
Cover the rest of the vanilla frosting for right now.
Assembling and Decorating the Pikachu Cake
assembling the cake: 10min | decorating the cake: 20-30min
Dollhouse Shortcut
If cake decorating doesn't bring you joy, just cover your cake in frosting and buy a pokemon cake topper. I'll link to some of my favorite cake toppers below.
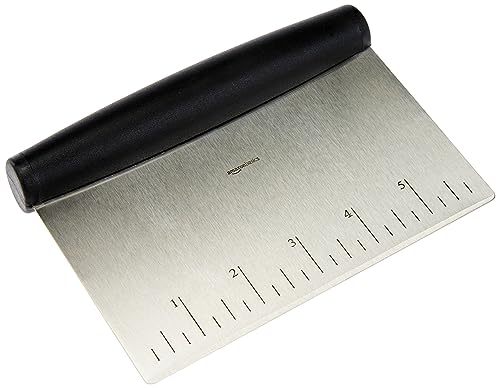
Level your cakes if they aren’t flat on top. Do this by using a long bread knife and slicing any parts off the top that are keeping the top of the cake from being flat. I usually don’t do this for just a 2-layer cake.
Pipe or dollop a small dot of frosting onto the center of one of your 10" cake boards and set the first cake on top of it, centering it in the center of the cake board.
Pipe chocolate frosting in a swirl on the top of the bottom cake layer using a cake turntable or cake spinner if you have one. Start at the center and work your way out to the outer edge, leaving enough room in your spiral for a second color. In lieu of a piping bag, you can also just dollop spoonfuls of the chocolate frosting onto the bottom layer sporadically.
Pipe vanilla frosting in a swirl filling in the gaps between the chocolate frosting. If you decided not to pipe the chocolate frosting and just dropped spoonfuls, do that again with vanilla frosting until the bottom cake layer is covered, and then, smooth it out using an offset spatula if you have one. Smoothing it out is optional, but I prefer the way it looks.
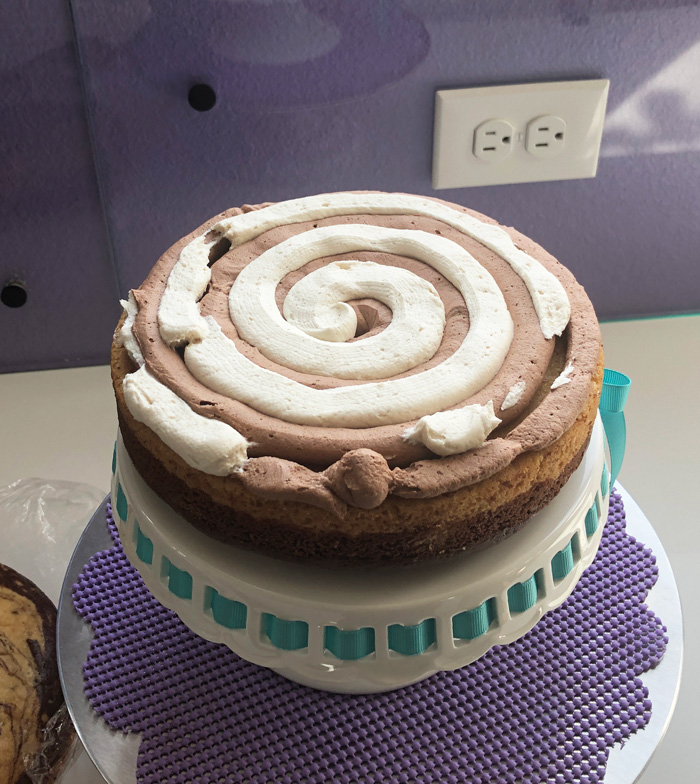
Set the second cake on top, trying to line it up perfectly with the bottom layer.
Pipe any remaining chocolate frosting and vanilla frosting from the piping bags on top of the cake.
Pipe frosting around the perimeter (the side) of the cake while spinning your cake decorating turntable (if you have one) to fill in the gap between the 2 cake layers. Alternatively, you can just use a butter knife or offset spatula to spread the frosting on the sides of the cake. If you run out of frosting and there are still parts of the cake that aren’t covered, use vanilla frosting to fill in the gaps. This is just your crumb coat, so it doesn’t have to be perfect looking. You’re going to cover it up with your final (pikachu yellow) frosting.
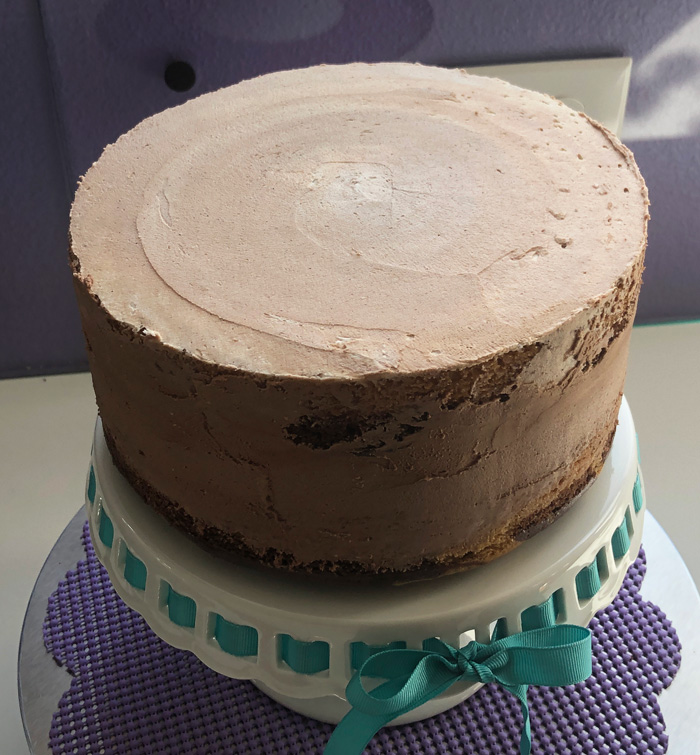
Smooth out the top of the cake using an offset spatula while spinning your cake decorating turntable (if you have one) to complete your crumb coat.
Carefully move your cake to the fridge or freezer to firm up while you start on your pokemon cake design.
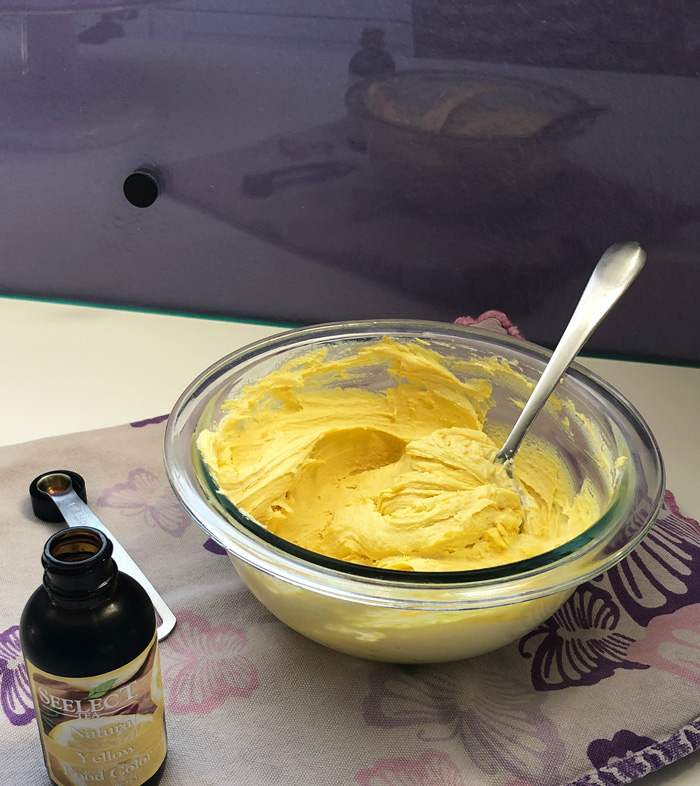
Uncover the vanilla frosting. It’s time to make some different colors for decorating the pokemon cake. Pikachu is mostly yellow with some black, white, and red. We only need about a teaspoon of white, 2 tablespoons of red, 4 tablespoons of black, and the rest yellow. If you’re not sure which food coloring is vegan, here’s a list of vegan food coloring. To make my yellow frosting, I used ¼ teaspoon of Nature’s Flavors liquid yellow food coloring.
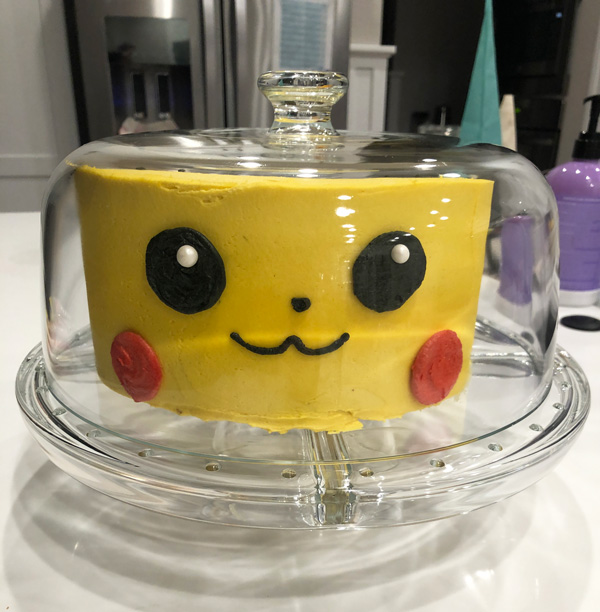
Fill a piping bag fitted with Wilton round tip 4 with red frosting. I made my red frosting by adding wilton red gel color to the white frosting. Pipe 2 red circles (pikachu’s cheeks) onto a piece of parchment paper. If you don’t have a piping bag, you can just dip your finger in the red frosting and finger paint the red cheeks onto the parchment paper. Transfer pikachu’s cheeks to the freezer to harden. If you’re not confident in your drawing skills (I’m certainly not), you can print a picture of pikachu from the internet, place your parchment over it, and trace. You can also just pipe the cheeks straight onto the pikachu cake if you have more confidence than I do.
Fill a piping bag fitted with a Wilton small round tip 2 or with black frosting. I made my black frosting by adding cocoa powder and activated charcoal (and a little nondairy milk to keep the consistency) to vanilla frosting. Pipe 2 black circles (pikachu’s eyes), a mouth, a nose, and 2 black ear tips onto a piece of parchment paper. Pikachu’s mouth and nose are actually easier to just pipe right onto the cake than they are to transfer from the parchment paper into the cake, so keep that in mind. If you have any round white sprinkles, add them to the eyes for that catchlight you see in pictures of pikachu. If you don’t have any vegan sprinkles, don’t worry. You can add the catchlight later with white frosting.
Place the parchment paper with the facial features in the freezer to harden.
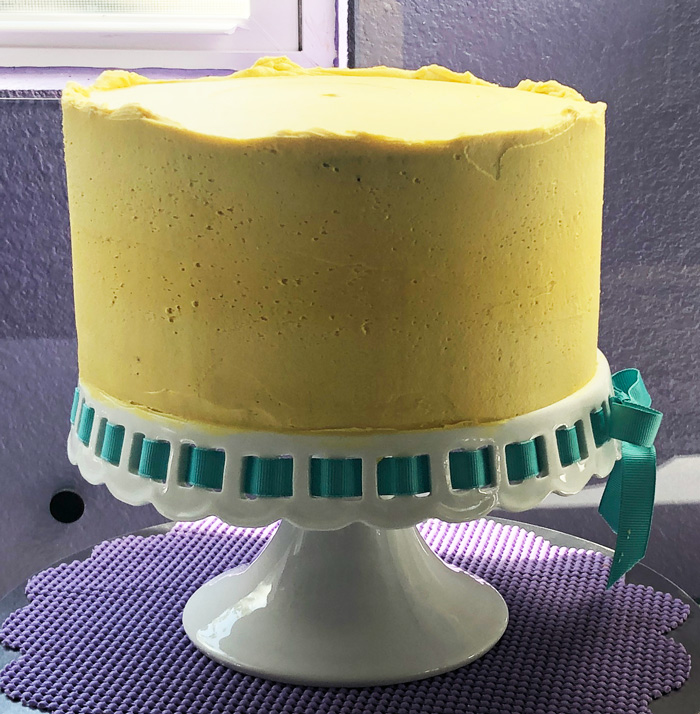
Remove the marble cake from the fridge or freezer. Cover the cake in yellow frosting, using an offset spatula or a bench scraper/chopper to smooth out the frosting as much as possible. I sometimes heat up my offset spatula by dipping into a jar of hot water and then drying it off with a towel before smoothing out the pikachu cake.
Peel pikachu’s eyes off the parchment paper and press them into the side of the pikachu cake. Do the same with pikachu’s cheeks, nose, and mouth. If the nose and mouth aren’t easily transferring, you can just pipe those facial features straight onto the pikachu cake.
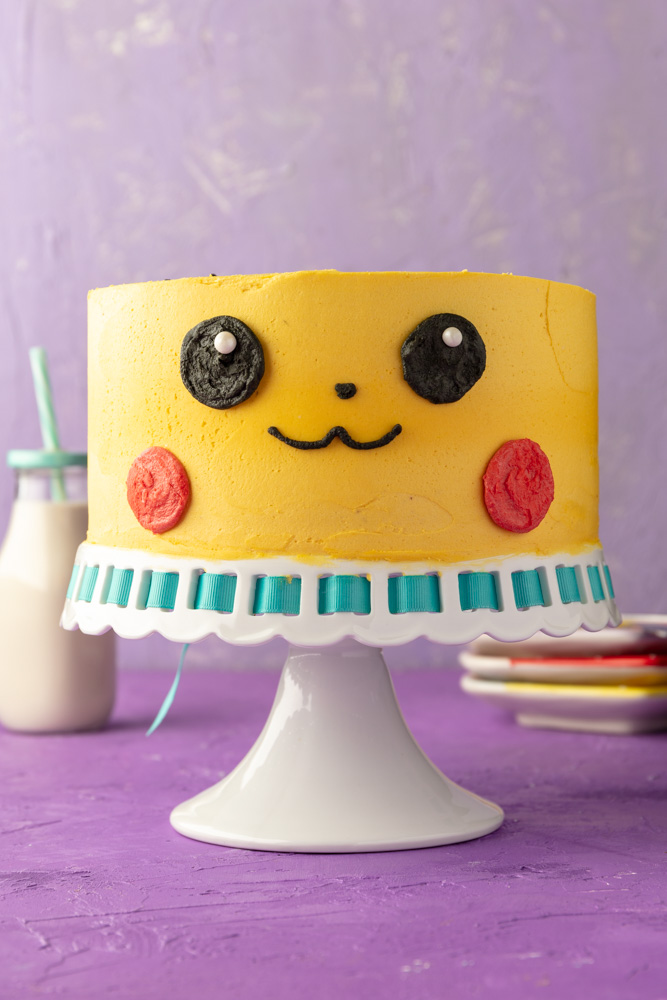
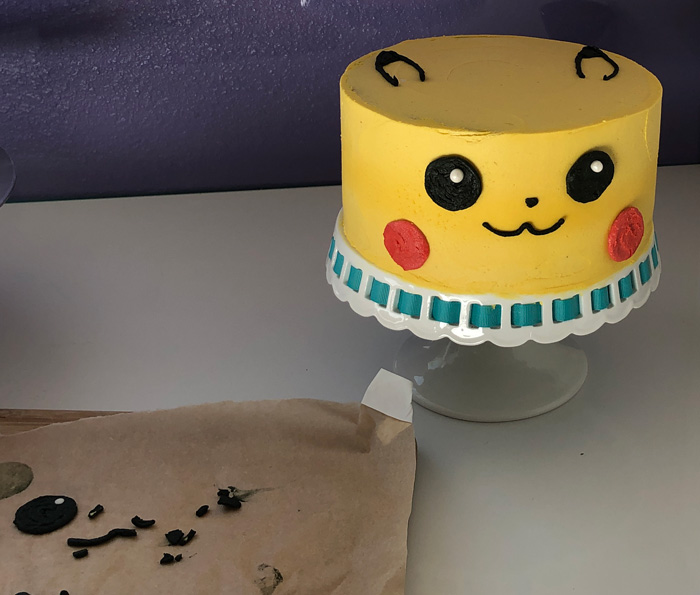
Peel the ear tips off the parchment paper and set them on top of the pikachu cake. Draw the rest of the outline of the ears straight onto the top of the pikachu cake.
If this is a birthday cake and you plan to write Happy Birthday on top, you may want to write it before you add the ears, to make sure you have enough room. I made this cake for one of the foster kids’s birthday through an organization I volunteer for, so I wrote Happy Birthday Gabe on this cake.
If you make this pikachu cake, and have any photos of it, post them to instagram, and tag me @vegandollhouse. I love to see your creations! You can also message me through instagram or email me if you have any questions about the recipe.
Tips and FAQ
Tip 1: Use room temperature ingredients
Whenever you make cakes, if you have time to leave the ingredients out on the counter for a bit before you start the recipe, your results will be better.
Tip 2: Don’t overswirl
I bet you didn’t think there was such a thing as too much swirling, but there is. If you want to see the distinct colors, you want to only swirl enough, and not too much. I like to make loops like a spirograph (remember that toy from the 70s? No? Well, I’m old so that toy is probably sold at vintage shops now, haha).
Can I make this recipe with less sugar?
Definitely! The cake part of this recipe already has less sugar than most cakes, but if the nondairy milk you are using is sweetened, you can reduce the amount of sugar you use by that same amount. You do have to do some math, which may not make you happy to hear, but I’ll give you an example, which will hopefully make it easier.
This cake recipe calls for 1 ¾ cups of milk. My oat milk says that a serving is 1 cup and has 7 grams of sugar in it. Since, 7 times 1.75 is 12, I can reduce the sugar from 300 grams to 288 grams. You’re of course also welcome to just experiment and use 250 grams of sugar and see how you like the results. If you reduce the amount of sugar in the recipe, you don’t have to make any other changes to the other measurements. If you want to reduce the sugar in the frosting recipe, replace the 3-4 cups of powdered sugar with 2-3 cups of powdered sugar, and omit the nondairy milk so it stays thick enough to decorate with.
Can I make this cake gluten free?
Yep. Just use a gluten-free flour blend in place of the all-purpose flour.
Can I use 6-inch cake pans if they’re all I have?
You sure can! Divide the batter into three 6" round cake pans instead of dividing the batter equally into two 9” or 8" round cake pans and set your timer for 25 minutes for your first toothpick test. If the cakes aren’t baked the first time you check them, just keep checking every 5 minutes until they’re ready.
Layered cakes give me anxiety. Can I make this as a one-layer cake?
I wish I could convince you that this birthday cake is easy to make, but it can also be easily baked as a sheet cake, a loaf, or a bundt. Just follow the same cake batter layering method I describe above (vanilla on the bottom and top and chocolate in the middle and then swirl) in an oiled lasagna pan or loaf pan or bundt pan, and if the toothpick doesn’t come out dry after the initial baking time, bake it for additional 5-minute increments until it does. Then decorate it however you like. If you do this, you can probably make a half batch of the frosting recipe or skip it altogether. This homemade marble cake taste great with no frosting at all.
Can I make this cake recipe into cupcakes?
Sure! This recipe will make around 24 cupcakes. Just follow the same batter layering method I describe above (vanilla on the bottom and top and chocolate in the middle and then swirl). Bake them for 18 minutes and then do the toothpick test.
Can I skip the cake decorating and just buy cake toppers?
If cake decorating doesn’t bring you joy, just cover your cake in frosting and buy a pokemon cake topper. Here is a pokemon birthday cake topper that you can have customized with a name or a word and print at home or at a fedex.
How do I store this cake?
I usually make my cakes in advance since they often take a whole day or more to make and decorate. Here’s a little cheat sheet for cakes that are fully covered in buttercream frosting.
- 1 day in advance: you can store the (uncut) cake in the fridge or on the counter uncovered, because the frosting acts as a barrier to protect the cake from drying out
- up to 1 week in advance: you can store the (uncut) cake in the fridge uncovered or in a cake carrier
- up to 3 months in advance: freeze the (uncut) cake uncovered until it hardens to the touch and then wrap it completely in cling wrap to keep it from drying out or taking on any weird freezer smells. Move it from the freezer to the fridge a day before you want to serve it, but don’t remove the cling wrap until 15 minutes before you’re ready to serve it.
- leftover cake: I store my cut cake in a cake dome on the counter for up to a week. You can also keep it in any tupperware that is large enough to fit it, either on the counter or in the fridge for up to 1 week. If you don’t plan to eat the leftover cake within a week, you can cut it into individual slices and wrap those slices in cling wrap before placing them in a freezer ziplock bag and storing them in the freezer for up to 3 months. Or just bring it to my house. I’ll teach you how I eat a 12-serving cake in 5 days or less.
Substitutions
- Oil: I recommend using safflower, sunflower, or coconut oil for baking cakes because those oils are made for high heat, which helps you avoid transfats. However, you can use any other oil such as vegetable oil, canola oil, grapeseed oil, etc. People even make cakes with olive oil, but I don’t recommend it.
- Lemon Juice: If you don’t have 4 ½ tablespoons (67g) of lemon juice, you can replace it with lime juice or apple cider vinegar (or even white vinegar). You just need some sort of vinegar to interact with the baking soda to make the cake rise.
- Shortening: If you don’t have access to spectrum sustainable organic palm shortening (or any vegan shortening), you can replace it with additional vegan butter or margarine. My favorite is the organic whipped Earth Balance, but if you avoid soy, you can buy the soy-free Earth Balance. If you do this, your frosting will be less stable at room temperature, so you should keep it in the fridge instead of on the counter, if your house is warm.
- Nondairy Milk: If you don’t have the full amount of nondairy milk that this recipe requires, you can substitute any amount with water, nondairy creamer, or coconut water. You can also mix and match different nondairy milks. I do this a lot when my macadamia milk only has a little bit left at the bottom and I use it up, and then I open a new container of almond, oat, or soymilk.
- Flour: If you don’t have 3 ½ cups (455g) all-purpose flour, you can replace some or all of the flour in this recipe with any combination of cake flour, wheat flour, spelt flour, or whole wheat pastry flour. It will taste healthier with some of these flours though.
- Sugar: For the 1 ⅓ cups (300g) sugar in the cake recipe, you can use any number of sugars, as long as they’re vegan: sucanat, coconut sugar, raw sugar, organic sugar, or demurara. If you’re not sure if your sugar is vegan, you can contact the company and ask, but basically, just avoid conventional white sugar or granulated sugar, and you should be ok.
- Baking Powder: Keep in mind that baking powder does expire, so it works best if it’s fresh/newish.
- Vanilla: Do not substitute imitation vanilla for the real vanilla extract in this recipe. It’s rare, but imitation vanilla can be made from something that comes out of beaver anal glands. (I can’t make this shit up.) If the nondairy milk you’re using is vanilla flavored, you can reduce the vanilla you add to the cake batter from 2 teaspoons (8g) to 1 teaspoon (4g).
Marble Cake Video
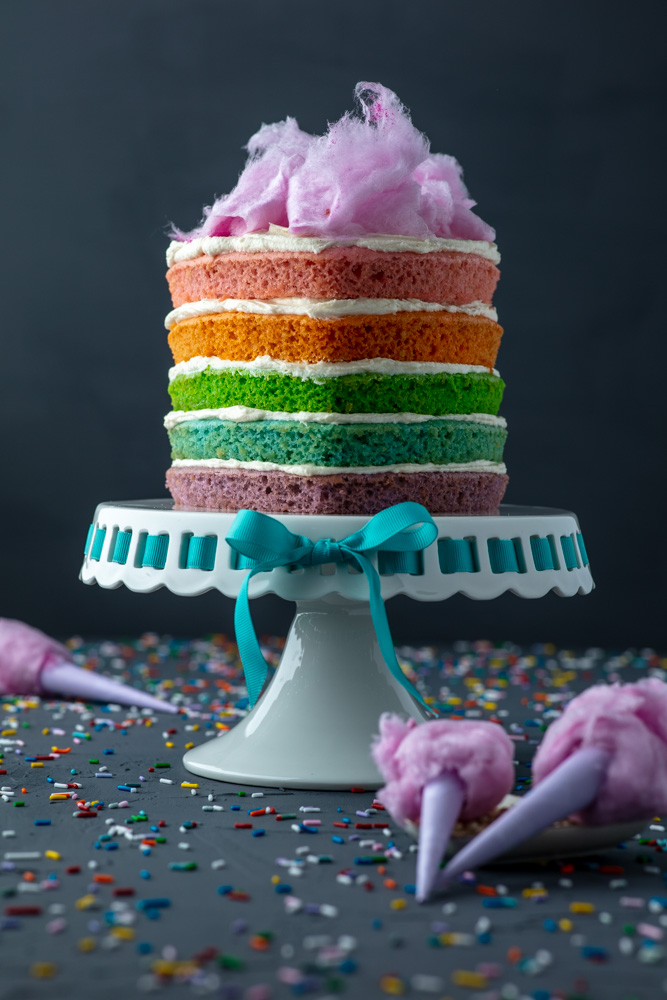
If you like this homemade marble cake, you might also like my pastel colored marbled coconut cake.
If you like this pikachu cake and want to see other birthday cake recipes that are decorated without fondant or cake toppers, you might also like my puppy cake or my tacocat cake.
If you like pokemon cakes, check out my snorlax cake. Other easy pokemon cake ideas can be a pokeball cake that takes inspiration from these pokeball cupcakes I made when I used to blog at ieatcupcakes.com before starting Vegan Dollhouse.
☆☆☆☆☆☆☆☆☆☆
I use mostly organic ingredients when I cook, but I realize that not everyone has the disposable income to purchase all organic ingredients. Therefore, I only specify organic on the ingredients that really matter - when buying the organic (or non-GMO) version is the only way to ensure that the item is vegan.
This post may contain affiliate links. Read more about them in my privacy policy.
☆☆☆☆☆☆☆☆☆☆


![[25pcs] 10" White Cakeboard Round,Disposable Cake Circle Base Boards Cake Cardboard Pizza Plate platter 10 inch,Pack of 25](https://m.media-amazon.com/images/I/41JwU6EVGIL._SL500_.jpg)


Rating:⭐⭐⭐⭐⭐
imtheveganoption -⭐⭐⭐⭐⭐ T-hina -⭐⭐⭐⭐⭐ Consistent Pea -⭐⭐⭐⭐⭐ emjay1000 -⭐⭐⭐⭐⭐