Colored Pie Crust
modified on , first published on

Have you been looking for a way to liven up your vegan pie? This vegan colored pie crust adds a little flare to a flaky, buttery pie crust.
This recipe will make 1 pretty colored pie crust.
Table of Contents
(click the links below to skip to the section you’re looking for)
- Pie Crust Recipe
- Blind Bake Pie Crust
- Frequently Asked Questions
- Ingredient Substitutions
- Nutritional Information
- Contact Me with Questions
- Pie Filling Recipe
♫ Listening to ♫
American Kids by Poppy
If you know me, you know I’m not a fan of pie crust. I avoid crust by pouring pie filling into cookie cups, by using biscuits in the place of pie crust, or by avoiding pie altogether.
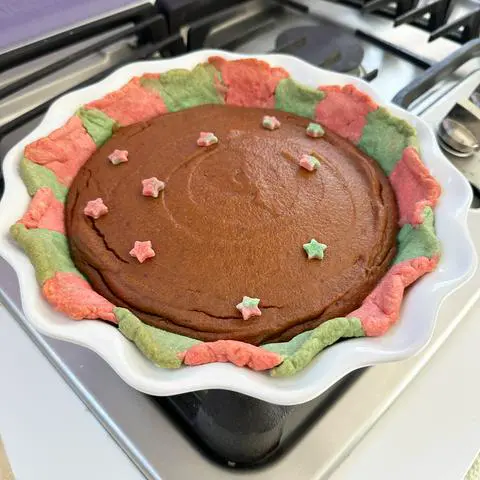
The one time I can’t avoid making pie is pumpkin pie on Thanksgiving. One year, I made crustless jar pie. Another year, I made a crustless pumpkin pie and decorated it to look like a fox. This year’s work around is to make a colored crust border. It will still taste the same, but I might be able to trick my taste buds into thinking it’s something better than pie crust.
Forget everything you knew from baking in your pre-vegan days. The 3-2-1 pie crust recipe doesn’t work with vegan butter, because vegan butter has more water in it than traditional butter.
Keep your device from going to sleep while you cook
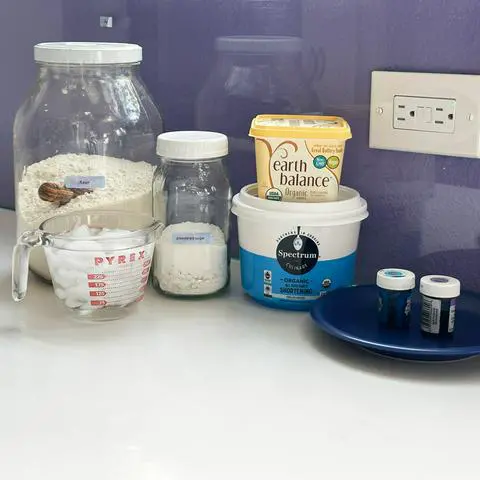
Ingredients for Colored Pie Crust
(jump to the substitutions section to see ingredient details and suggestions for substitutions)
- 2 cups (260g) unbleached all-purpose flour
- 2 tablespoons (16g) organic or vegan powdered or granulated sugar (optional)
- ⅓ cup (64g) organic palm shortening
- ⅓ cup (72g) vegan butter or margarine
- 3 tablespoons (44g) ice water
- vegan food coloring (avoid pitaya powder)
How to Make Colored Pie Crust
prep time: 38 min | chill time: 1-2 hours
Dollhouse Shortcut
To save time, purchase a vegan frozen pie crust from the store, remove it from the pan, and skip to the step where you color the dough.
Freeze all the ingredients for 10 minutes before you start: 2 cups (260g) flour, ⅓ cup (64g) organic palm shortening, ⅓ cup (72g) organic vegan butter or margarine, and 3 tablespoons (44g) of ice water. It takes me 6 minutes to measure out the ingredients.
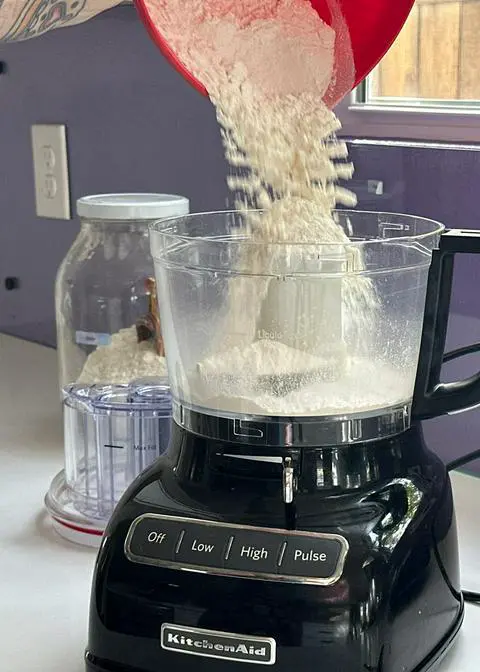
Fill the bowl of a food processor fitted with the S blade with 2 cups (260g) flour and 2 tablespoons (16g) organic powdered sugar. The organic powdered sugar is optional if you like a sweeter pie crust. If you don’t have a food processor, just use a mixing bowl.
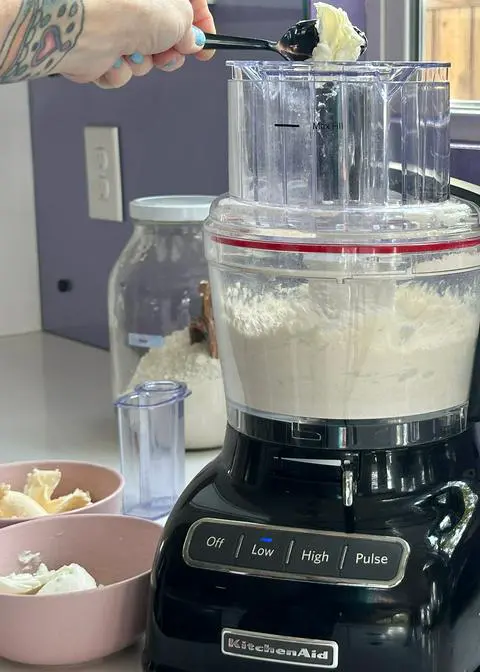
Add the ⅓ cup (64g) Spectrum sustainable organic palm shortening and ⅓ cup (72g) vegan butter, but not all at once. It will mix in easier if you add it little by little using the pulse button on the food processor to make sure you don’t overwork the dough. If you don’t have a food processor, just use the back of a fork to mash the butter and shortening into the flour like the method I use when I make my scones. Like with my scones, it’s ok to have lumps of butter and shortening.
Drizzle up to 3 tablespoons (44g) ice water in slowly in through the top hole while the food processor is running. Keep drizzling until the dough starts to stick together and forms a ball. As soon as you see little dough balls form, you can stop adding the water. You don’t have to use all of the water if it isn’t needed. If you’re doing this by hand, just drizzle a little, then mix. Drizzle a little, then mix.
Divide the pie dough into equal(ish) sized pieces, if you want more than one color.
Add vegan food coloring to each dough ball. Use a gel food color, rather than a food-based color for this project, otherwise the color won’t come out as vibrant as you might want it. Mix wilton sky blue gel color and wilton leaf green gel color to make mint green. I used wilton pink gel color and mint green to make my Christmas pie crust.

Knead each pie dough ball until they’re all one color. You can wear vegan disposable gloves if you don’t want to color your hands. If it feels like it’s too crumbly, add a little more water. If it feels too sticky/wet, add more flour.
Flatten each colored dough ball into a disc.
Wrap them in cling wrap (I spent about 25 minutes up until this part).
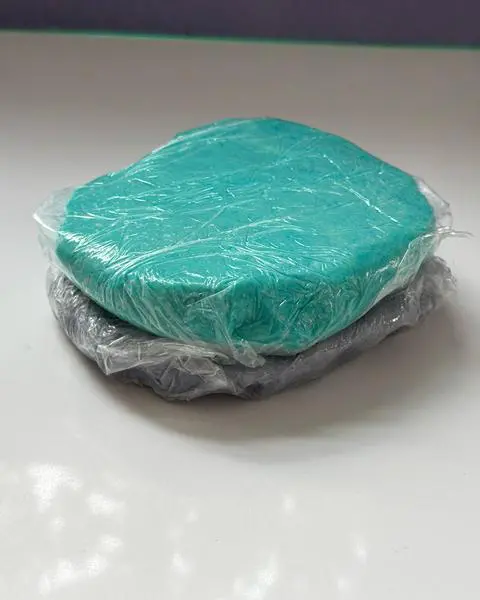
Chill the dough discs in the fridge for at least an hour, but preferably 2 hours. This is a good stopping point if you like to break up baking into smaller tasks. If you want to stop here for the day, you can freeze these dough discs in a ziplock freezer bag until you’re ready to use them. If you’re in a hurry, try freezing your dough discs for 15 minutes. This will make the dough harder to roll, so I only recommend this in emergency situations.
Measure your pie pan before you start rolling your dough so you know how big to roll it. Then add an inch to your measurement so you have a little extra. My pie pan diameter is 13" so I’m rolling my dough to have a 14" diameter.
I use a pliable measuring tape to measure my pie pan diameter. Start at the very edge of one side of the pie pan, going to the center of the pie pan by dipping down the side and hugging the inside of the pan the entire way. Then continue to the other side, and up the wall of that side and out to the furthest edge from where you started.
If you don’t have a measuring tape, the best guess is to roll your dough to a diameter of 13 inches. I’m lucky that my rolling mat has measurements on it, but if yours doesn’t, you can always draw on a piece of parchment paper. Or just eyeball it. It doesn’t have to be perfect, right? I say that, but then I’m (not so) secretly disappointed when I make things that don’t come out perfect.
Remove the dough discs from the fridge once they’re chilled. If they were frozen for more than 20 minutes, you may need to wait 10-15 minutes before you can roll them.
Combine all the colors together in a ball.
Roll the chilled dough on a rolling mat using a rolling pin. If you don’t have a rolling mat, roll your dough on parchment paper. I rolled mine to ⅙ inch (4mm), but often people roll pie crusts as thin as an eighth of an inch (3mm). As you roll it, keep rolling in different directions to make sure it’s rolling evenly. If the dough sticks to the rolling mat or the rolling pin, add flour to both. I didn’t need to use any flour, but if you don’t chill the dough long enough, you might need to. Rolling the dough takes me about 5 minutes.
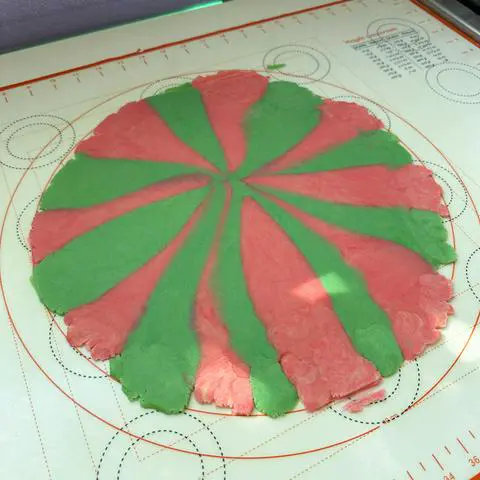
Transfer the rolled pie dough to the pie pan. This is one of the most challenging steps for me. One nice thing about using a rolling mat instead of the counter is that you can use the rolling mat to help you transfer the dough. Some people use their rolling pin, but I’ve never successfully been able to do that.
Tidy up the dough. I like to use some of the overhang to add extra dough to parts that might be thinner. Press the rest of the overhang towards the pie pan, making the edges nice and tall. This helps to keep them from breaking and cracking, but it also helps with shrinkage. Transferring the dough into the pie pan and pressing it all into place takes me about 8 minutes.
Chill the pie crust until you’re ready to blind bake it or fill it. If you plan to blind bake your crust or bake your pie now, preheat the oven to 375°F (190°C). If you want to stop here, chill the pie crust until you can cover it in cling wrap without messing it up. Chill or freeze the crust until you’re ready to bake it.
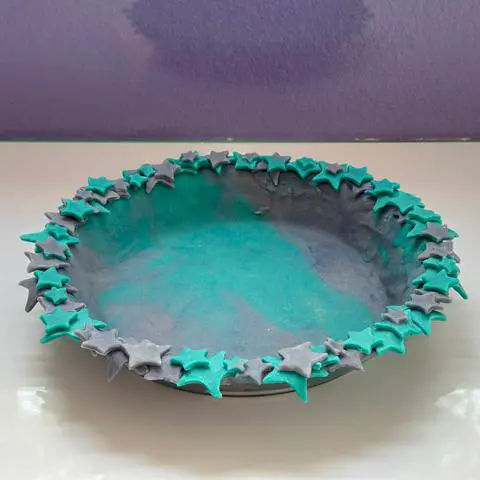
How to Blind Bake The Pie Crust
prep time: 5 min | bake time: 20 min
Blind baking a pie crust just means pre-baking it before you add the filling. Blind baking is either done halfway for custard pies like vegan pumpkin pie. Or you can completely blind bake a pie crust for pies where the filling only needs to set and not bake, like my nutella pie or my mini chocolate pudding pies.
Preheat the oven to 375°F (190°C), if you haven’t already.
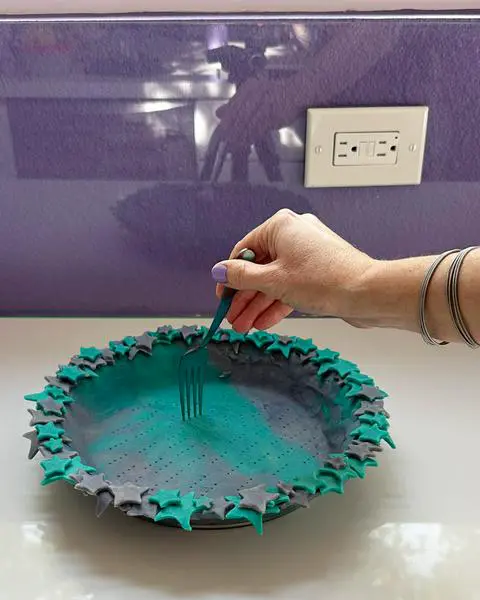
Poke the bottom with a fork a whole lot of times. I’ve only poked it like 5 times before, and it wasn’t enough. You want tons of holes to keep bubbles from forming when it bakes.
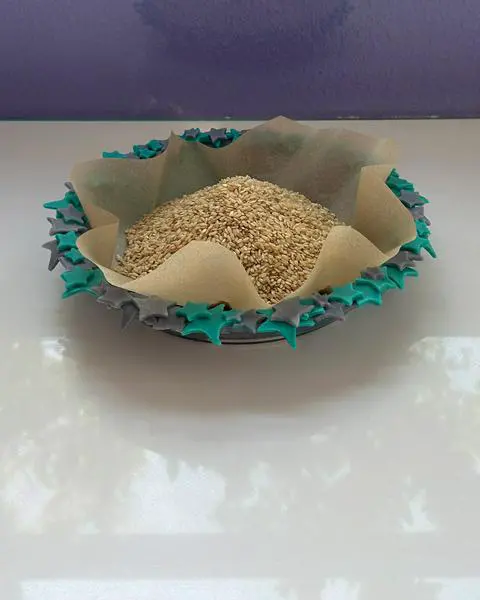
Cut a round piece of parchment paper slightly larger than the size of your pie crust.
Lay the parchment circle in the center of the pie crust.
Fill the parchment paper with beans or grains to weigh it down. It doesn’t need to go all the way to the top. You just want to cover the bottom with some weight. If the oven is still preheating, place the pie pan back into the fridge until the oven beeps.
I use the same blind baking rice every time. When I’m done using it, I pour it back into my container. It’s labeled blind bake, so I don’t accidentally mix it up with my normal rice.
Bake at 375°F (190°C) for 10-20 minutes in the centermost or bottom rack of your oven. For pumpkin pie, any custard pie, or any fruit pie filling that has been partially precooked on the stove, we only need to half bake the crust, so 10 minutes is plenty for this first bake. For a pie where the filling is already completely cooked like a chocolate pudding pie or a fresh fruit pie, this first bake should be for 20 minutes.
Remove the pie from the oven, and gently lift out the parchment paper. I do this right next to my container where I keep my blind baking grains so I can just pour them right back into the container as I lift it out of the pie pan.
Bake the crust again for another 10-15 minutes, depending on what kind of pie you’re making. For pumpkin pie, we only need 10 minutes for this second bake. For a pie where the filling is already completely cooked like a coconut cream pie or banana cream pie, this second bake should be for 15 minutes to fully bake it. To make sure the crust doesn’t turn too brown, cover the edges with a pie shield or foil.
While it bakes, you can follow the instructions for making your pie filling. Since that recipe is for 2 pies, make sure you halve it.
Remove the crust from the oven.
Fill with pie filling and follow the baking instructions for that pie recipe if you’re ready. If you were preparing this pie crust in advance, let it cool completely, wrap it in cling wrap, and put it in a freezer bag before freezing.
When you bake this pie, you don’t want the crust to brown the way you do with an uncolored crust. To avoid this, cover the crust area with a pie shield or foil.
Tips and Frequently Asked Questions
Want to make your pie crust ahead of time? Here are some options.
- After wrapping the dough discs in plastic wrap, put them into freezer bags and store them in the fridge for up to 3 days or in the freezer for up to 1 month. A day before you’re ready to roll the dough, transfer the discs from the freezer to the fridge.
- Blind bake your crusts, cool, and wrap with plastic wrap and then put into freezer bags before chilling for up to 3 days or freezing for up to a month. A day before you’re ready to fill your crust and bake your pie, transfer the pie crust from the freezer to the fridge.
Pie Crust Recipe Additions
I added 2 tablespoons of organic powdered sugar to my dough because I like slightly sweetened dough. You can omit that. Some people add spices to pie crust like cinnamon, nutmeg, and cardamom. Or if you like savory pies, you can replace it with salt and spices.
Ingredient Substitutions
- Flour: I used 2 cups (260g) organic unbleached all-purpose flour in this recipe. To make gluten-free pie crust, just replace the all-purpose flour with a gluten-free flour blend.
- Organic Palm Shortening: I used Spectrum sustainable organic palm shortening because it’s sustainably harvested. You can sub coconut oil if you don’t have access to vegan shortening.
- Vegan Margarine I used organic whipped earth balance because it’s my favorite. If you avoid soy, buy the soy-free earth balance. You can use any brand of vegan butter or margarine you prefer. Just remember that all vegan butter is made differently, so you may need to add slightly more or less water depending on the water content of the butter you use.
- Vegan Food Coloring: I used wilton gel colors for this recipe, but you can look at my entire list of vegan food coloring for other options.
Nutrition Facts
The nutrition information below is based on the recipe without the optional 2 tablespoons of powdered sugar.
- Servings: 8
- Calories per serving: 254
- Calcium per serving: < 1mg
- Cholesterol per serving: 0mg
- Dietary Fiber per serving: < 1mg
- Vitamin A per serving: 77mcg
- Iron per serving: 0mg
- Potassium per serving: 2mg
- Protein per serving: 4g
- Total Carbohydrate per serving: 25g
- Total Fat per serving: 15g
- Total Sugars per serving: 0g
- Sodium per serving: 68mg
Comments or Questions?
If you make this recipe, I would love it if you’d snap a pic, post to instagram, and tag me @vegandollhouse. It seriously makes my day/week/month!
Please message me (instagram or email) if you have any questions or feedback about the recipe.
What to Pair with This Recipe
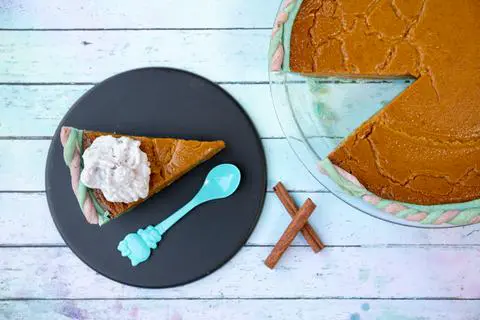
If you are looking for something to fill this pie crust with, I recommend halving my crustless pumpkin pie recipe and using that. The baking instructions remain the same.
☆☆☆☆☆☆☆☆☆☆
This post links to items I mention. If you click on one, you will go to a website (like Amazon) where you can buy the product. Sometimes, the store you purchase from (Amazon, Etsy, etc.) will pay me for referring you. This costs you nothing extra, and I would never recommend a product that I don’t use. These affiliate programs help me buy ingredients to create recipes for you. Read more about this in my privacy policy.
I mostly cook with organic ingredients, but only specify organic when it’s necessary to ensure the item is vegan.
☆☆☆☆☆☆☆☆☆☆


Rating:⭐⭐⭐⭐⭐
that_chickpea -⭐⭐⭐⭐⭐ rockmyvegansocks -⭐⭐⭐⭐⭐ eatbettersour -⭐⭐⭐⭐⭐ happyapplevegan -⭐⭐⭐⭐⭐ skyehighe -⭐⭐⭐⭐⭐ Brass_Machop -⭐⭐⭐⭐⭐ alltheflour -⭐⭐⭐⭐⭐ legumecat -⭐⭐⭐⭐⭐ gravitydefiant -⭐⭐⭐⭐⭐ PlatypusKitchen -⭐⭐⭐⭐⭐ KemoKizzie -⭐⭐⭐⭐⭐ Fuzzy_Welcome -⭐⭐⭐⭐⭐ frooootloops -⭐⭐⭐⭐⭐ Ketnip_Bebby -⭐⭐⭐⭐⭐ Some_Programmer -⭐⭐⭐⭐⭐ ShmogieJoe -⭐⭐⭐⭐⭐