Korean Rice Balls (Jumeok Bap)
modified on , first published on
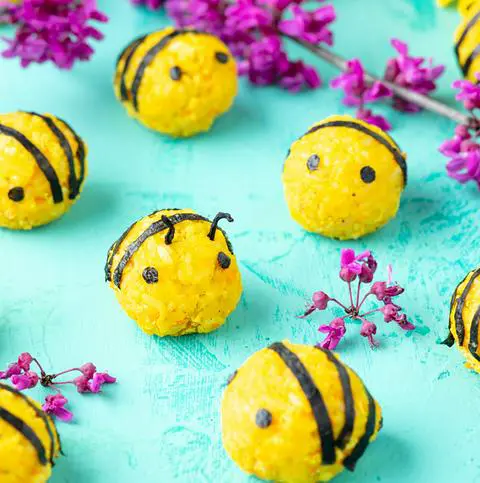
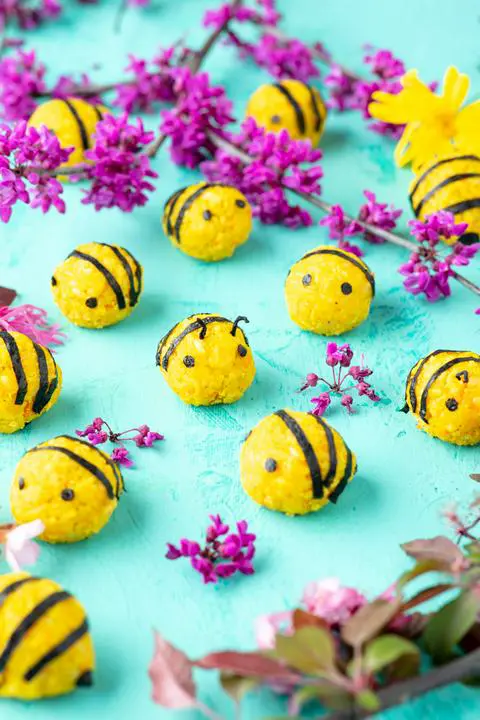
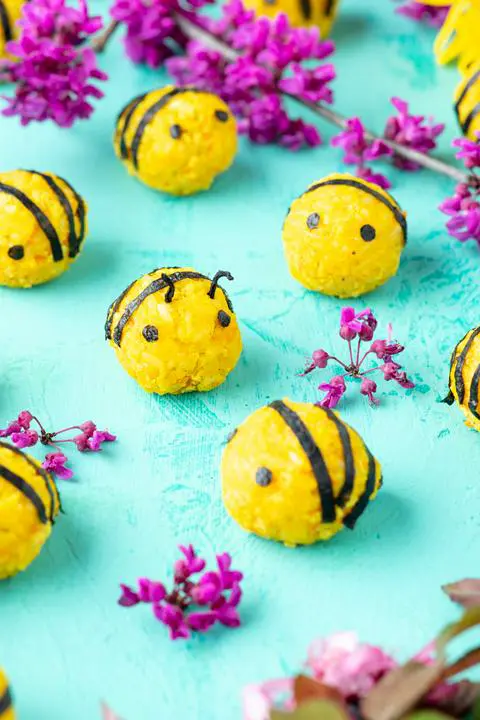
These gluten-free and vegan Korean rice balls (Jumeok-bap), are easy to make. Jumeok Bap is an excellent lunch, snack, or picnic food that can be customized to your preference depending on what fillings you want to add. This recipe uses a tofu eggless salad to flavor them and even includes instructions to make them look like little bumble bees for a tea party, baby shower, or just a special lunch for your little one.
This recipe makes 24 Korean rice balls that look like bumble bees.
Table of Contents
(click the links below to skip to the section you’re looking for)
- Vegan Sushi Rice Recipe
- Eggless Filling Recipe
- Korean Rice Balls Recipe
- Frequently Asked Questions
- Ingredient Substitutions
- Nutritional Information
- Contact Me with Questions
- Similar Recipes
♫ Listening to ♫
Oh! My mistake by APRIL
If you’re not obsessed with cute food and kawaii food like I am, you can make this recipe even faster by rolling the rice balls in seaweed flakes (or mixing the seaweed into the rice balls) instead of making honey bees.
Seasoned Rice Ingredients
- 2 cups (432g) white sushi rice
- 2 cups (460g) water
- 1 tablespoon (14g) sesame oil
- 1 teaspoon (5-6g) salt
- yellow food coloring (optional, but I used ¼ teaspoon nature’s flavors liquid yellow)
Seasoned Rice Directions
prep time: 5 minutes | cooking time: 30 minutes
Dollhouse Tip
I make my rice in an instant pot, but you can make yours in a rice cooker or on the stove if you don’t have an instant pot.
Rinse 2 cups of white sushi rice under cold running water by measuring the rice into a strainer/sifter and spraying the water directly over that. I run the water for as long as I have patience for. Some people think it should be 2 entire minutes. I probably only do it for 20-30 seconds.
Transfer the rinsed sushi rice to the instant pot liner and add 2 cups of filtered water.
Lock the instant pot lid and set the release valve to the sealing position. On my instant pot, this means I push the valve to the back as far as it will go.
Press the rice button. On my instant pot, the rice button sets the pressure to low pressure and the time to 8 minutes. Some people cook their rice on high pressure for longer than 8 minutes, but this setting has proven to work best for mine. Basically, it’s hard to mess this up, and you’ll probably be fine no matter what your rice setting does.
Make the filling for your korean rice balls while you wait for the rice to cook. I’m using my eggless salad filling in mine.
Transfer the cooked rice from the instant pot liner to a medium sized bowl (choose a bowl that will have extra room for mixing).
Add 1 tablespoon sesame oil, ¼ teaspoon salt, and vegan yellow food coloring (I used ¼ teaspoon of Nature’s Flavors liquid yellow food coloring). This is a perfect application for using an all-natural food coloring since you add it after the cooking process is completed. See my guide to vegan food coloring for a list of all-natural food colorings. The food coloring here is optional. I’m using it because I want to make mine into bumble bees.
Mix the rice until the color is evenly distributed, cover the bowl, and set aside until you’ve finished making your filling.
Eggless Salad Filling Ingredients
- 1 package (453g) extra-firm tofu, drained
- ½ cup (100g) diced celery
- ¼ cup (70g) diced carrot
- ¼ cup (56g) vegan mayo
- 1 (15g) tablespoons mustard
- 1 teaspoon (3g) turmeric
- 1 teaspoon (4g) garlic powder
- 1 teaspoon (2g) onion powder
- ½ teaspoon (3g) salt
- ¼ teaspoon pepper
Eggless Salad Filling Directions
prep time: 10 minutes
Dollhouse Shortcut
If you freeze the package of firm tofu for a day and then defrost it for a day, the tofu will be super easy to squeeze the water out of…like wringing out a sponge.
Dice the celery and carrot finely, either by hand or using your food processor fitted with the S blade.
Crumble the tofu (after you’ve drained the water out of it) into a mixing bowl, either by hand or using your food processor fitted with the S blade. I just add my tofu to the food processor while the diced celery and carrot are still in there.
Add the following ingredients to a bowl with the crumbled tofu and the diced veggies: ¼ cup vegan mayo, 1-2 tablespoons mustard, 1 teaspoon turmeric, 1 teaspoon garlic powder, 1 teaspoon onion powder, ¼ teaspoon pepper, and ½ teaspoon salt (most of these ingredients are optional, but it tastes best if you use them all).
Mix until incorporated.
Seaweed Rice Ball Ingredients (optional)
- 1-3 sheets of nori seaweed
- 24 pieces of hijiki seaweed
How to Shape the Korean Rice Balls and How To Decorate Them With Seaweed Sheets
prep time: 1 hour and 15 minutes
Dollhouse Shortcut
If you don’t want them to look like bees, you can save an hour of time by skipping the seaweed decoration. Forming round rice balls only takes 15-20 minutes.
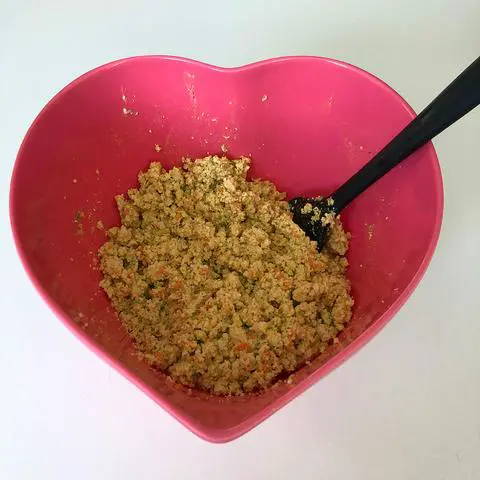
Mix the eggless salad with the seasoned rice until it’s all blended together.
Put on disposable vegan gloves (optional, but makes it easier to keep the rice mixture from sticking to your hands) and grab a small handful of the rice tofu mixture. If you don’t have any gloves, just make sure you wet your hands or cover them in sesame oil, so the rice doesn’t stick to your hands.
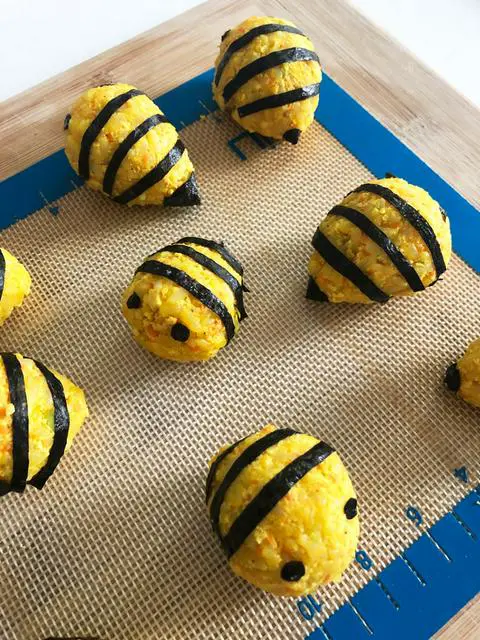
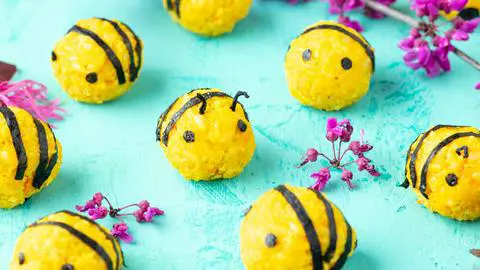
Shape the vegan rice balls. You can make bumble bee shapes or traditional ball shapes. The bee shape is like a round rice ball, but it tapers into a slight point on one end, like a teardrop shape.
Set each rice bee onto a silicone mat or a baking sheet or cutting board covered in parchment paper (the only reason I use a board or tray is so I can move them around the kitchen).
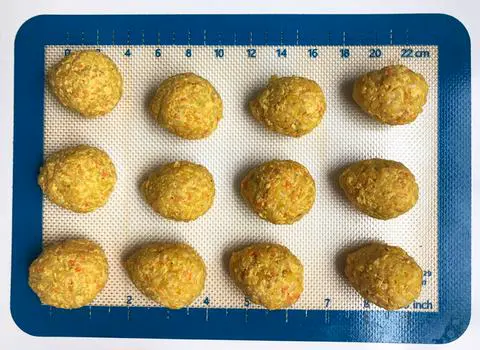
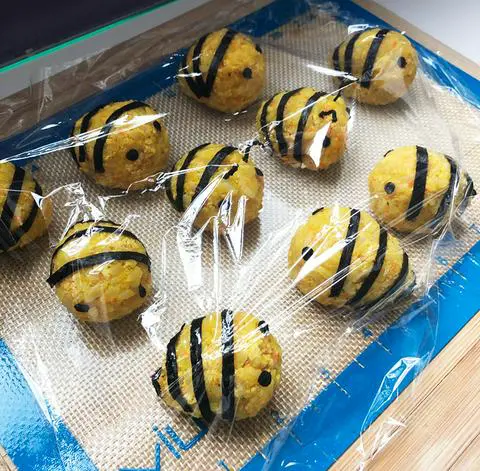
Cover all the rice bees with a piece of plastic wrap while you prepare the seaweed stripes, stingers, and eyes.
Cut thin strips of nori seaweed using kitchen scissors. You don’t have kitchen scissors? Weirrrrrd (kidding). Just wash and dry any pair of scissors you have and use those.
I only needed one sheet of nori for mine because I didn’t make my stripes go all the way around the bee bodies. If you’re a perfectionist and you want your bee stripes to go all the way around, you’ll need one long thin nori strip for each stripe. If you’re fine with the way I did mine, you can get 3 bee stripes out of one long thin strip.
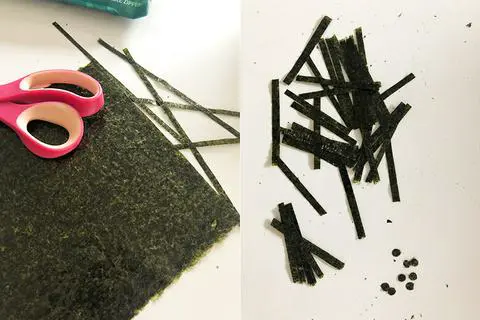
Punch small circles out of nori using a standard sized hole punch (if you’re my age, you may remember the days of 3-ring binders - that’s the size you want for the eyes). You need 2 circles for each bee, so punch out 48 circles, plus some extra just in case.
Cut out stingers (optional). For the stingers, I cut out circles of nori that were about the size of a penny (diameter = ¾ inch or 19mm). Then I made a cut as long as the radius of the circle (from the outer edge of the circle to the center). Then I overlapped the cut edges to shape the circle into a cone shape. I dipped my finger in a small bowl of water to seal the overlapped parts of the nori. Make as many stingers as you want.
I only made stingers for about half my bees to save time, but if you want all your bees to have stingers, you’ll need 24. The bees do look cuter with the stingers, but if you’re cutting the circles by hand and don’t have a hole punch that size, then you might not want to make that many. They still look cute without stingers.
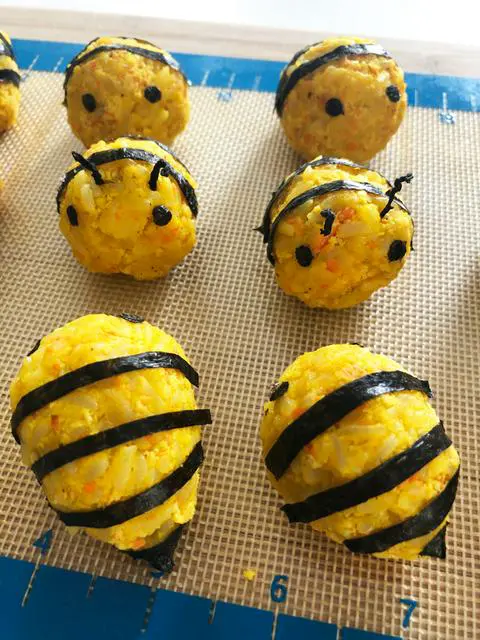
Place the seaweed stripes, eyes, and stingers onto the bees (that’s the order I did it in). I used 3 stripes per rice ball. I dipped my finger into a bowl of water to help the seaweed stick to the rice ball.
Optional: if you want your bees to have antennae, you can poke some hijiki seaweed into their little heads. I did this on a couple for aesthetics.
Cover them with cling wrap until you’re ready to serve them.
Serve with soy sauce, wasabi, or just plain.
Comments or Questions?
If you make this recipe, I would love it if you’d snap a pic, post to instagram, and tag me @vegandollhouse. It seriously makes my day/week/month!
Please message me (instagram or email) if you have any questions or feedback about the recipe.
FAQ about Korean Rice Balls
What are Korean rice balls?
Korean rice balls are called Jumeokbap (주먹밥) in Korean. They are sushi rice mixed with sesame oil and salt, and any other add-ins are optional and customizable. In Korea, they’re served with spicy foods to help cool down your mouth in between bites of spicy food.
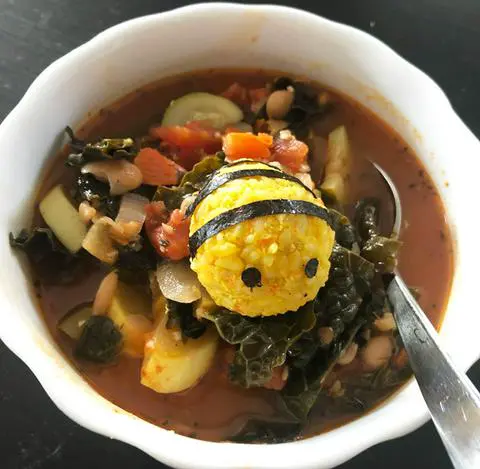
If you’ve spent any amount of time on this website, you may have noticed that I avoid spicy food because I’m a big baby. So, I serve these with soups and stews or I have them as snacks or appetizers.
How is Jumeok Bap (Korean rice balls) different from onigiri (Japanese rice balls)?
Honestly, they’re not much different. Onigiri are triangle shaped and jumeok bap are spherical shaped (well, when you don’t shape them into bees).
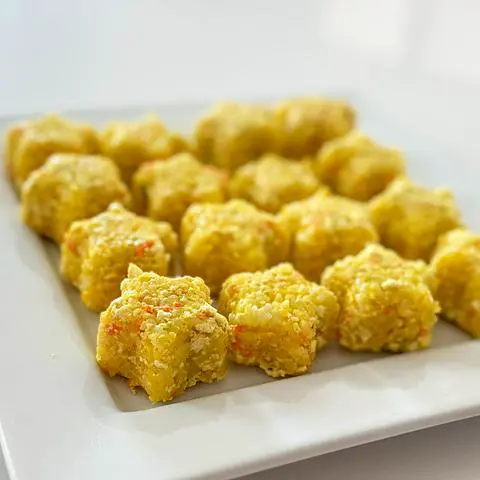
I made these for New Year’s Eve and made them in the shape of stars. This recipe made about 30 rice stars.
Can you make the rice balls ahead of time and refrigerate or freeze them?
Korean rice balls are best eaten the day you make them, but if you’re making these in advance for a party or event, fear not. You can refrigerate them for up to 3 days or freeze them for up to 3 months ahead of time.
Follow the recipe until you get to the part where the rice balls (or bees) have already been formed. Then wrap each one tightly in cling wrap before placing in the fridge. If you’re freezing them for a while, transfer them from the freezer into a ziplock freezer bag after a few hours before returning them to the freezer for a longer period of time. The day before you want to decorate and serve them, transfer them from the freezer to the fridge to thaw. From the fridge, unwrap them, cover them with a damp paper towel or tea towel, and microwave them for 15-20 seconds to bring them back to life. Then serve or proceed with the instructions to decorate them to look like bees.
Substitutions
- Eggless Salad: Replace any of the fillings in this recipe with fillings of your choosing: veggies, plant-based meats, vegan tuna, vegan kimchi, sesame seeds, etc.
- Sushi Rice: If you don’t have sushi rice, you can use another short-grain rice, such as short-grain white rice or arborio rice.
- Vegan Mayo: There are many brands of vegan mayo you can use for this recipe, such as Wildwood Garlic Aioli, Just Mayo, or Follow Your Heart vegan mayo. If you avoid vegan mayo, you can replace the vegan mayo in this recipe with avocado, but it may alter the color a little bit.
Nutrition Facts
- Servings: 24
- Calories per serving: 100
- Calcium per serving: 50mg
- Cholesterol per serving: 0mg
- Dietary Fiber per serving: 1g
- Folate per serving: xxxmcg
- Iron per serving: < 1mg
- Potassium per serving: 56mg
- Protein per serving: 3g
- Total Carbohydrate per serving: 15g
- Total Fat per serving: 3g
- Total Sugars per serving:
- Sodium per serving: 118mg
Comments or Questions?
If you make this recipe, I would love it if you’d snap a pic, post to instagram, and tag me @vegandollhouse. It seriously makes my day/week/month!
Please message me (instagram or email) if you have any questions or feedback about the recipe.
Similar Recipes
I have quite a few other recipes that use sushi rice.
My rainbow sushi cake is a show stopper if you’re looking for a special ocassion meal. If you want an easier warm version that’s nice for wintertime, try my sushi rice casserole.
If you prefer smaller single-serving sushi rice recipes like this one, check out my vegan temaki, my sushi cupcakes, my vegan musubi, and my tuna onigiri.
☆☆☆☆☆☆☆☆☆☆
This post links to items I mention. If you click on one, you will go to a website (like Amazon) where you can buy the product. Sometimes, the store you purchase from (Amazon, Etsy, etc.) will pay me for referring you. This costs you nothing extra, and I would never recommend a product that I don’t use. These affiliate programs help me buy ingredients to create recipes for you. Read more about this in my privacy policy.
I mostly cook with organic ingredients, but only specify organic when it’s necessary to ensure the item is vegan.
☆☆☆☆☆☆☆☆☆☆



Rating:⭐⭐⭐⭐⭐
daleminie -⭐⭐⭐⭐⭐ thechestnutbakery -⭐⭐⭐⭐⭐ thebarefootedkitchen -⭐⭐⭐⭐⭐ forfoodandforests -⭐⭐⭐⭐⭐ chris.says.nature -⭐⭐⭐⭐⭐